Player's Manual
This translation is from an earlier version of the guide: the Portuguese version may have news.
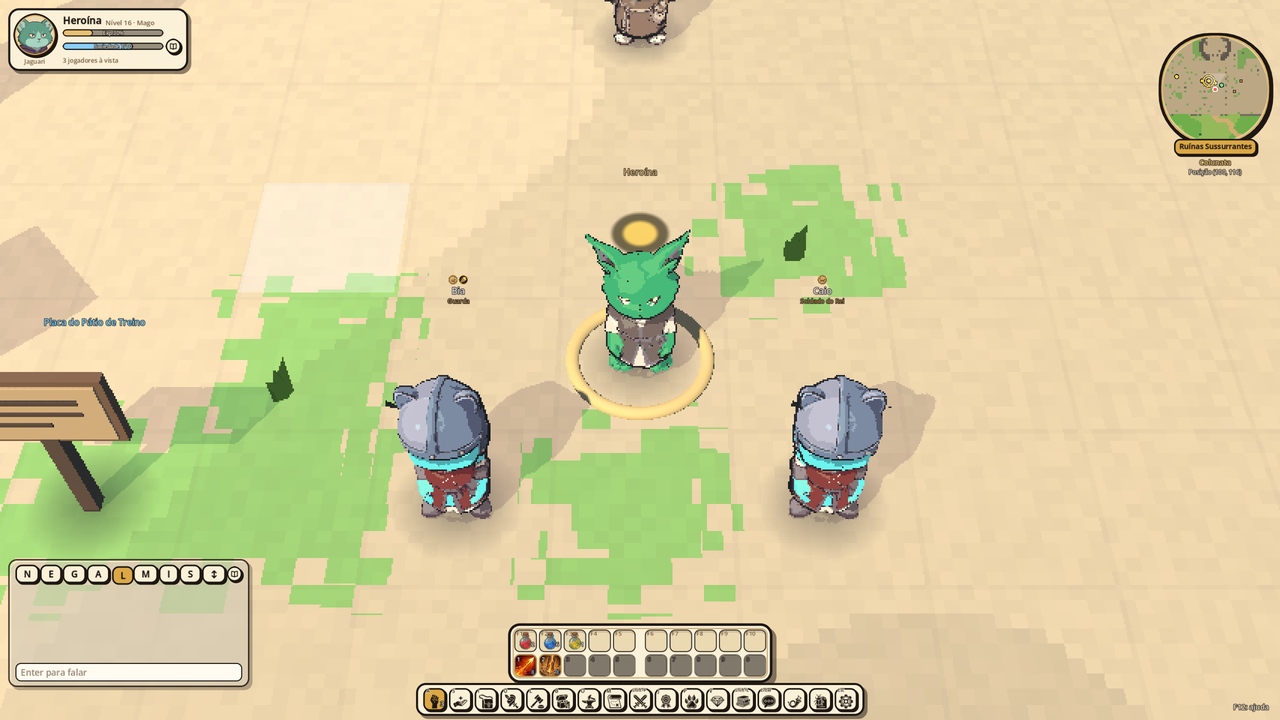
Welcome to Paroi! This manual covers the basics to start playing: how to walk, fight, grow, craft, play in a party and trade. The numbers given are today's. They live in data/ and may change with balancing. The images are screenshots of the game itself, with sample characters, except for those in chapter 14, which are illustrations of the places.
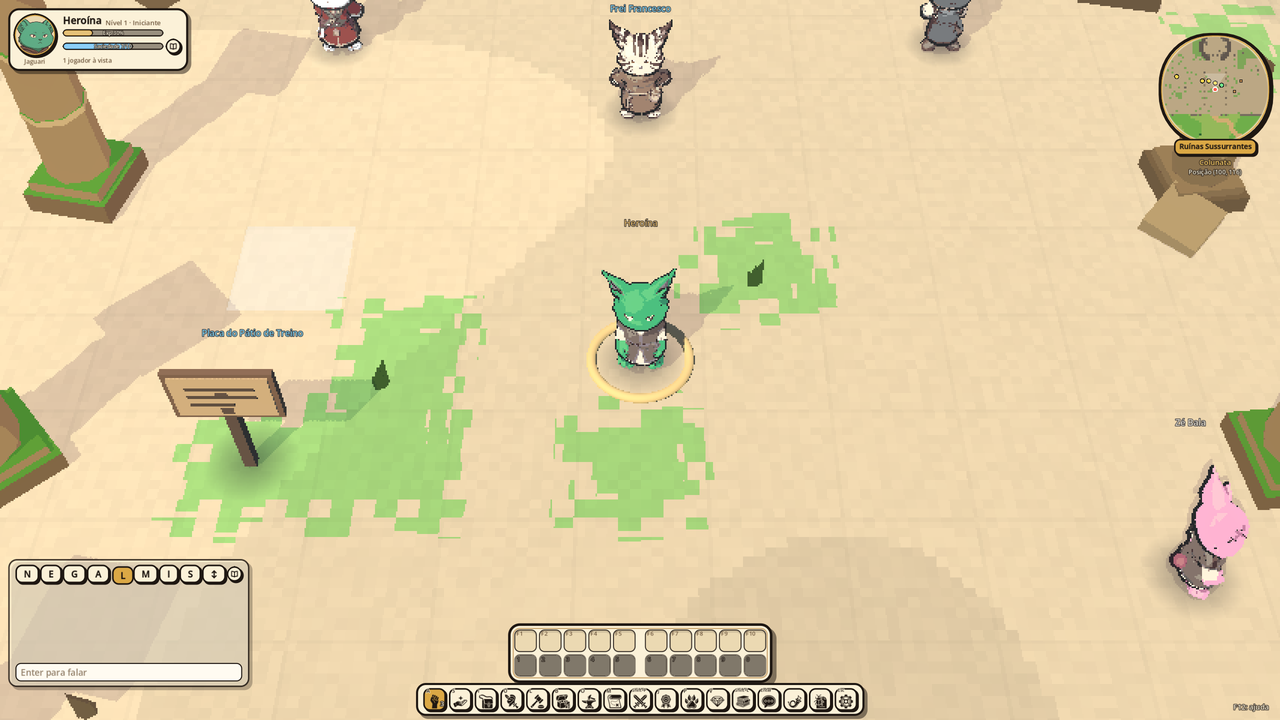
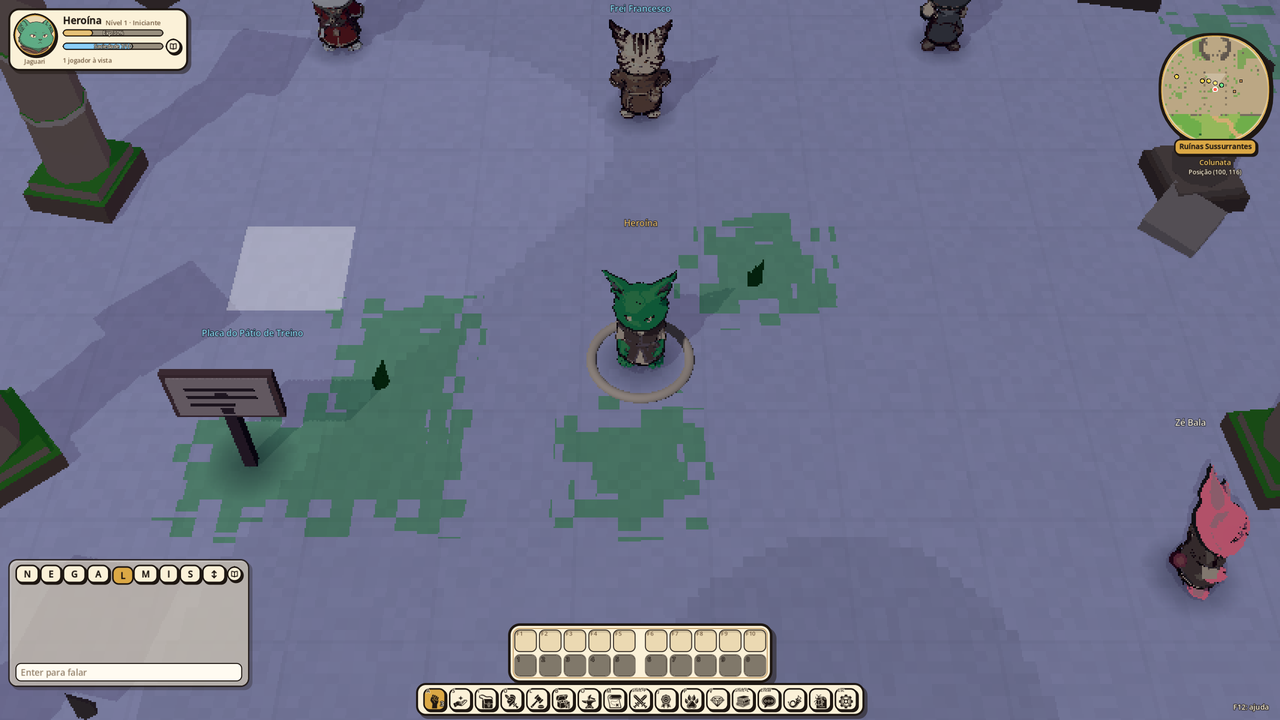
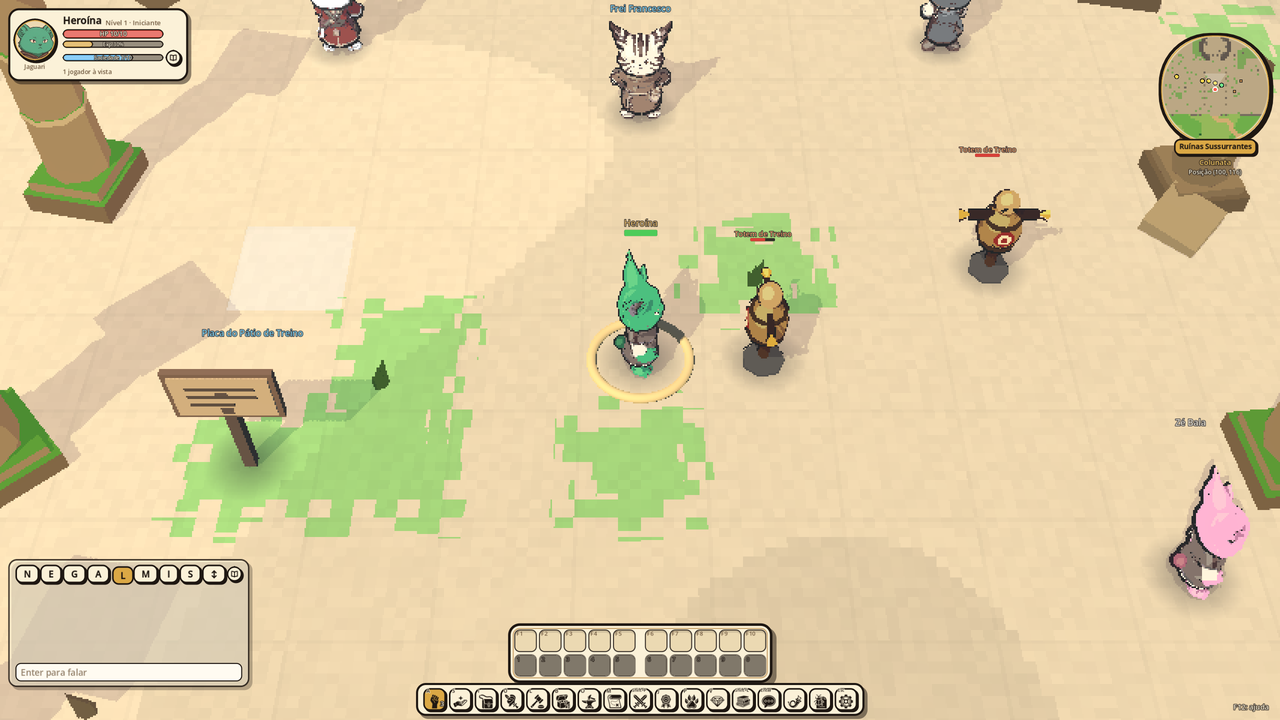
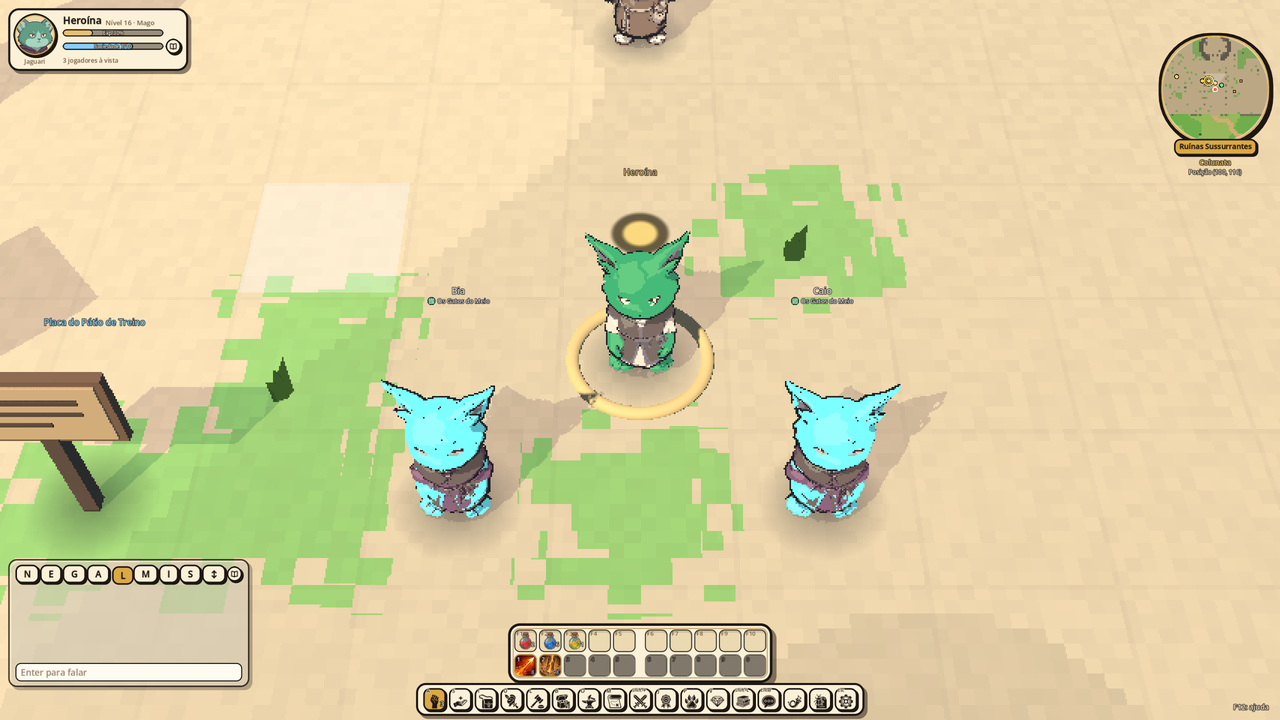
On screen: at the top left, your portrait with HP, MP and experience; at the top right, the minimap; at the bottom left, the chat; at the bottom center, the skill bar (1 … 0), the item bar (F1 … F10) and the window buttons.
Every window in the game is a paper card with a black outline: the title sits on a gold plate at the top, and the round × in the top right corner closes it (so does the key that opened it). The round gold + raises an attribute, a skill or a trade skill; when it is grayed out, you are short of points. The ? opens the window's help, where there is one.
Start here: your first hour
▶ Video: Creating your user and getting your first levels (YouTube, in Portuguese). From creating your account and character to talking with the Captain and your first levels on the totems. Stay in this training ground until level 10: the totems and the slimes around the wall are made for beginners, and outside it the monsters are already too strong.
Ten steps for someone who has never played. Each one points to the part of the manual that explains more.
- Get in. Download the game at paroimmo.com/baixar, create your account through the invitation link and choose your player name: it becomes the surname of all your characters, and it is how your family will find you (First steps).
- Create your character: a name with no spaces, the race (Jaguari, Varanis, Harpari or Sauvis) and the skin color.
- Talk to Captain Stefano Bianco, in the Training Room where you are born: click him and read the conversation to the end. He gives you level 2 and a club: open your bag (I key) and double-click the club to wield it.
- Spend your points in the attributes window (A key, the gold +): if you will fight up close, put them in STR and VIT; if you will be a mage, in INT (Attributes).
- Train. Go out the east door to the Training Yard and click the Training Totems: they take hits, don't hurt you and give experience. After that, the slimes around the wall fight for real. Out of combat, your HP comes back on its own; sitting (Ctrl Ctrl) speeds it up.
- Play together. Right-click a player from your family and invite them to a party. Each different player in the party raises everyone's experience (up to double), and the loot is shared. In the chat, /g talks only to the party (Party).
- At level 10, choose your class with Master Giulia Ferrante, in the Ruins' colonnade: Mage, Warrior, Priest or Acrobat (Classes). Skills are raised with the S key and cast with 1 … 0.
- Travel with the world map. Shift+M, click the place and then Set the route: blue dots on the ground lead you to the right exit. Walk on the dirt roads: there, monsters don't attack passers-by. Whisper Village is west of the Ruins; Aurélia, the capital, is to the east, past Baron's Road.
- Sell and store. Merchant Enzo Moretti, in Whisper Village, buys your loot; the Bank (B key) shows your coins and sends M$ to your family (Bank).
- Died? You wake up at the start of the Ruins, near Friar Francesco, who gives you a loaf of bread a day and answers questions. Any question in the game: F12. Found a bug? The Report button, on the bottom bar.
1. Controls
Press F12 in the game to see this list at any time.
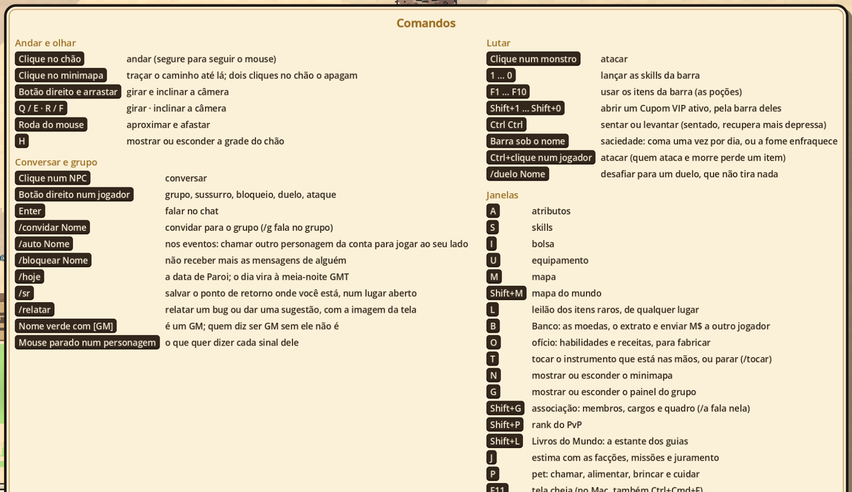
| Key or action | What it does |
|---|---|
| Click the ground | Walk (hold the button to follow the mouse) |
| Click an NPC | Talk |
| Click a monster | Attack |
| Right-click a player | Invite to the party or to the association, follow |
| Right-click and drag · Q / E · R / F | Rotate and tilt the camera |
| Mouse wheel | Zoom in and out |
| A · S · I · U · M | Attributes · skills · bag (items) · equipment · map |
| Shift+M | The world map: the places you have already discovered and the route to them |
| L | Auction of rare items, from anywhere |
| B | Bank: your coins in your bag and in your account storage, the statement, and sending M$ to another player, from anywhere (see Bank) |
| O | Trade: trade skills and recipes, for crafting |
| J | Standing, missions and oath: how much each faction likes you, and your missions (see Standing and Missions) |
| P | The pet: call, feed, play, revive and release (see The pet) |
| T | Play the instrument in your hands, or stop; /tocar does the same (see Musical instruments) |
| Shift+G | The association: the members, the ranks, the notice board and invitations (see Associations) |
| Shift+P | The PvP ranking |
| N · G · H | Show or hide the minimap, the party panel and the ground grid |
| Click the minimap | Set the route to the clicked spot: a blue ring on the minimap and blue dots on the ground all the way there. Double-clicking the ground clears the route. On the full map (M), clicking does the same. |
| 1 … 0 | Cast the skills on the bar |
| F1 … F10 | Use the items on the bar (potions; each one always stays on the same key, and eggs are left out) |
| Shift+1 … Shift+0 | Open the window of the active coupon in that slot of the coupon bar. The key only opens the window: no coupon is spent by it (see VIP Coupons) |
| V | Open or close the VIP Shop, where VIP Coupons are bought with the account's VIP Points (see VIP Coupons) |
| Ctrl Ctrl | Sit or stand up (sitting, you recover faster, but you can't walk, attack or use skills and items; a monster's hit also makes you stand up) |
| Enter | Talk in the chat |
Report (on the bottom bar, next to Sound) · /relatar |
Report a bug or make a suggestion to the game team (see Reporting a bug or an idea) |
| F11 (on Mac, also Ctrl+Cmd+F) | Full screen: turns it on and off, on any screen; the choice is saved on this computer. The first time, the game opens in full screen. In the menu (Esc), under Settings, the Window button cycles through fractions of the screen (60% to 100%) and, after 100%, full screen |
| Esc, Settings, the Interface and World pixels buttons | The size of windows and text (automatic, based on your screen, or 110%, 125%, 150% and 90% of that) and the size of the world's pixels (automatic, based on your screen, or coarse, 1/4, medium, 1/3, and fine, 1/2; coarse also spares a weak computer). Both choices are saved on this computer. On a narrow screen, the interface shrinks a little and, if it still doesn't fit, the bottom bar buttons turn into icons, with the name in the tooltip |
| Esc | Menu: Continue, Help, Settings (Sound, Window, Interface, World pixels and Characters on screen; Esc goes back to the menu), Back to selection, Log out and Quit game, which closes the program |
2. First steps
When you create your account, you choose your player name. Everyone sees it, and it becomes the surname of all your characters: if your player name is NarutoRULEX, your Itatich shows up to others as "Itatich NarutoRULEX". Another player can have an Itatich too, with their own surname. Don't use your username as your player name: your username is your secret. Older accounts choose their player name on the character selection screen.
Every new character is born in a Training Room, next to the Whispering Ruins. Talk first to Captain Stefano Bianco: he explains the game and gives you your first level. NPCs with a "!" above them have something for you.
- The rooms are numbered. Rooms 1 to 4 always exist, with up to 20 players each; when they are all full, Room 5 opens, then 6... After the captain's explanation, a "!" lights up over Orderly Nico Bellucci, next to him: she tells you about the rooms and which one you are in. In one of the four, if a friend was born in another one that has room, choose their room in the window that opens at the end of the conversation. Back with the captain, he asks what you want, with one button per answer: hear the explanation again or listen to a story about the fort.
- In the room, each NPC does one thing: Captain Stefano explains the game; Orderly Nico changes your room. Outside it, Clerk Lívio Marino, on the road east of the Ruins, passes on the requests of the noble houses (from level 5), and Watcher Teo Rocca, outside the North Gate of the Ruins, receives the oath of the Hill Watch (warriors of level 10).
- The east door of the room leads to the Ruins' Training Yard. To go back to the room, go in through the door in the southeast corner of the yard.
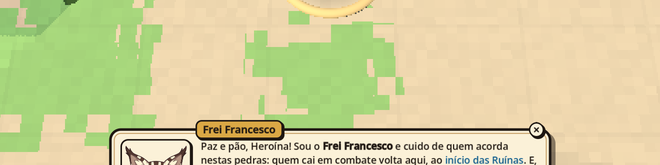
- If you fall, you wake up at the start of the Ruins, in the colonnade, not in the room. Friar Francesco is there: he gives you a free Wheat Bread every day, up to level 20, and answers a newcomer's questions (hunger, death, the return point, classes and attributes).
You are a sentient. At creation, you choose your name (no spaces: the space separates the name from the surname), your race and your skin color.
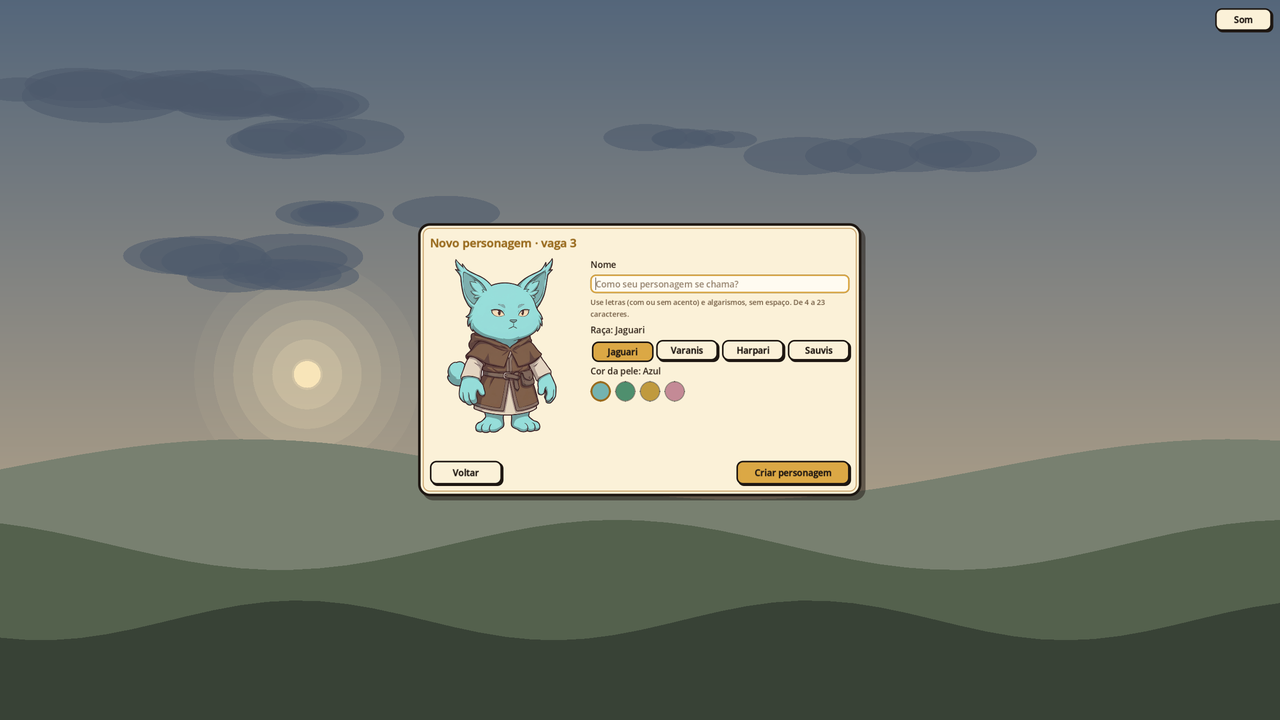
Sentients come in four races, each one in the shape of one of the goddesses:
| Race | What it looks like | Where it comes from | The goddess who takes its shape |
|---|---|---|---|
| Jaguari | Cat face, big tufted ears and a pom-pom tail | Valdora | Labris |
| Varanis | Smooth-scaled lizard, a fan-shaped crest in place of ears and a long tail | The Isle of Vésper | Vitta |
| Harpari | Short-feathered bird, orange beak, feather ears and a short fan tail | The hills and moors of Valdora | Sonata |
| Sauvis | Smooth-shelled ant, big eyes and antennae, no tail | The mines of Vésper | Juno |
Race only changes your looks: attributes, classes, skills and items are the same for all four. All races use the solid colors (from Blue to Apricot); the patterned ones (from Zebra to Calico) are for the Jaguari only, and each of the other races has six colors of its own. Race and color can't be changed once the character is created.
3. Attributes: how to spend your points
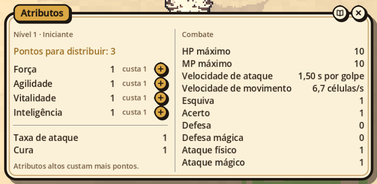
You start with 3 attribute points and get 3 more every level. To spend them, open the attributes window (A) and click the gold + on the attribute you want to train.
| Attribute | What it gives |
|---|---|
| STR (Strength) | Physical attack and accuracy (accuracy also counts for spells) |
| AGI (Agility) | Evasion, attack speed and movement speed (a little per point, less and less), and shortens spell casting |
| VIT (Vitality) | HP (+3 per point) and HP regeneration |
| INT (Intelligence) | MP (+2 per point), magic attack and MP regeneration |
- Cost of each point: raising an attribute costs 1 point up to 10, 2 from 11 to 30 and 4 from 31 to 100. Putting everything into a single attribute gets expensive, so spread it out a little.
- For each class: the Warrior lives on STR, the Acrobat on AGI, the Mage on INT and the Priest on VIT. Every class benefits from a few points outside its main attribute: the mage needs STR to land spells, and everyone needs VIT to hold out.
- Leveling up fills your HP and MP.
Example: a future mage at level 10
At level 10, you will have gathered 30 points (3 from the start and 3 for each of the 9 levels). A balanced split for a future Mage:
| Attribute | From → to | Points spent | Why |
|---|---|---|---|
| INT | 1 → 10 | 9 | MP and magic attack; the Mage needs at least 5 |
| VIT | 1 → 10 | 9 | HP to survive the first hits |
| AGI | 1 → 8 | 7 | Evasion and shorter casting |
| STR | 1 → 6 | 5 | Accuracy, which also counts for spells |
Up to 10, each point costs 1; from 11 on, it costs 2. Taking INT from 10 to 11 costs the same as raising two low attributes, so think before putting everything into one.
4. Classes
You start as a Novice. At level 10, choose your class with Master Giulia Ferrante, in the colonnade. Each class requires at least 5 in its attribute and Protect, which you learn with the skill point from level 5.
| Class | Role |
|---|---|
| Warrior | Goes in front and hits hard, with sword and shield. Gives the party strength, and with Heroism doubles their own damage and draws the monsters to themselves |
| Acrobat | Fast and discreet, fights with a dagger in each hand. Leaps over barriers, finds traps and slips past monsters unnoticed |
| Mage | Casts spells from afar: fire, ice, stone pillars that block the way and lightning storms. Needs MP |
| Priest | Takes the hits and looks after the party: heals HP, restores MP and blesses allies |
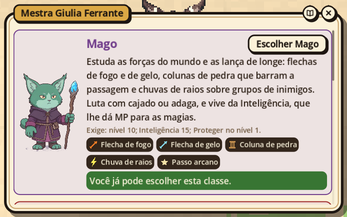
▶ Video: Reaching level 10 and becoming a Mage (YouTube, in Portuguese). Level 10, the conversation with Master Giulia and choosing Mage. Along the way, the player also equips some sandals that dropped from a totem: double-click them in the bag (I key).
5. Skills
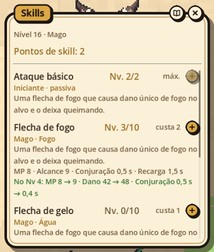
- Skill points: at level 5, the Novice gets 1 point, for the basic attack. From level 10 on, you get 1 point every 3 levels (10, 13, 16...). Spend them in the skills window (S).
- Using a skill: the active skills you learn go onto the bar on their own, in the order of the skills window; use the 1 … 0 keys. Spells take some casting time, and taking a hit can interrupt them. A targeted skill opens the aim: click the monster (or, for an ally skill like Heal, yourself or another player). To cast an ally skill on yourself, press its key twice quickly.
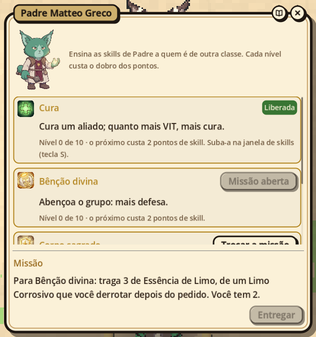
- Skills from another class: the class masters of the Ruins (Warrior Bianca Rinaldi, Acrobat Chiara Fontana, Mage Lorenzo Vitale and Father Matteo Greco) teach their skills through a mission drawn for you. A skill from outside your class costs twice the points and only goes up to level 10: Master and Grandmaster belong to the class that owns it.
- Protect: the Novice learns to protect themselves. Cast the skill out of combat and you stay protected for 30 minutes; casting it again before it ends renews the time. While protected, dying takes nothing from you: neither experience nor level. Up to level 49, protection costs no experience; from level 50 on, the experience you gain drops to 98%. Protection only takes effect 30 seconds after you cast it: until then, a yellow number above your head counts down the remaining seconds. When it runs out, the padlock lights up above your head, the ring on the ground turns blue and the chat tells you that protection is now active. It ends when you die (a death while it was already active still costs nothing) and carries on if you leave the game and come back, until the time runs out. The border of the slot also shows whether it is waiting or active, and the chat tells you when it ends. It costs 2.1 MP per character level, rounded (21 MP at level 10), in any class.
- The buffs that are running: every timed buff (from a skill, from food, from a potion, or a balm applied to an equipped item) shows up at the top of the screen, to the right of the character's frame, with its icon and the time left, counting down second by second; hover over it to read its name. When the time runs out, it disappears. A skill that toggles on and off and the music of an instrument, which have no time limit, show with the icon only, with no time, while they last. With a timed VIP Coupon running, the buffs sit one line below the tickets.
6. Fighting, dying and recovering
- Fighting: click the monster to attack. Every monster has a level, and the plate under its name shows it. Those stronger than you hit harder and give more experience and items.
- Recovering: out of combat, HP and MP come back little by little. Sitting (Ctrl Ctrl), they come back faster. Potions on the bar (F1 … F10) heal instantly.
- Walking faster: AGI speeds up your pace a little with each point. The Swiftness Potion, which drops from any regular monster (1 in 100, not from bosses), makes your pace 25% faster for 15 minutes; the Agility Potion, from level 175, takes it to the maximum for 10 minutes. Both end if you die.
- Leveling without hunting: hunting is the fastest way, but not the only one. Crafting (see Trades), harvesting or slaughtering on your plot (3% of what your level needs per harvested cycle) and delivering quests (5% for the daily ones, 10% for the weekly ones) also give experience. Everything is measured by your level, so it works the same at level 5 and at 500.
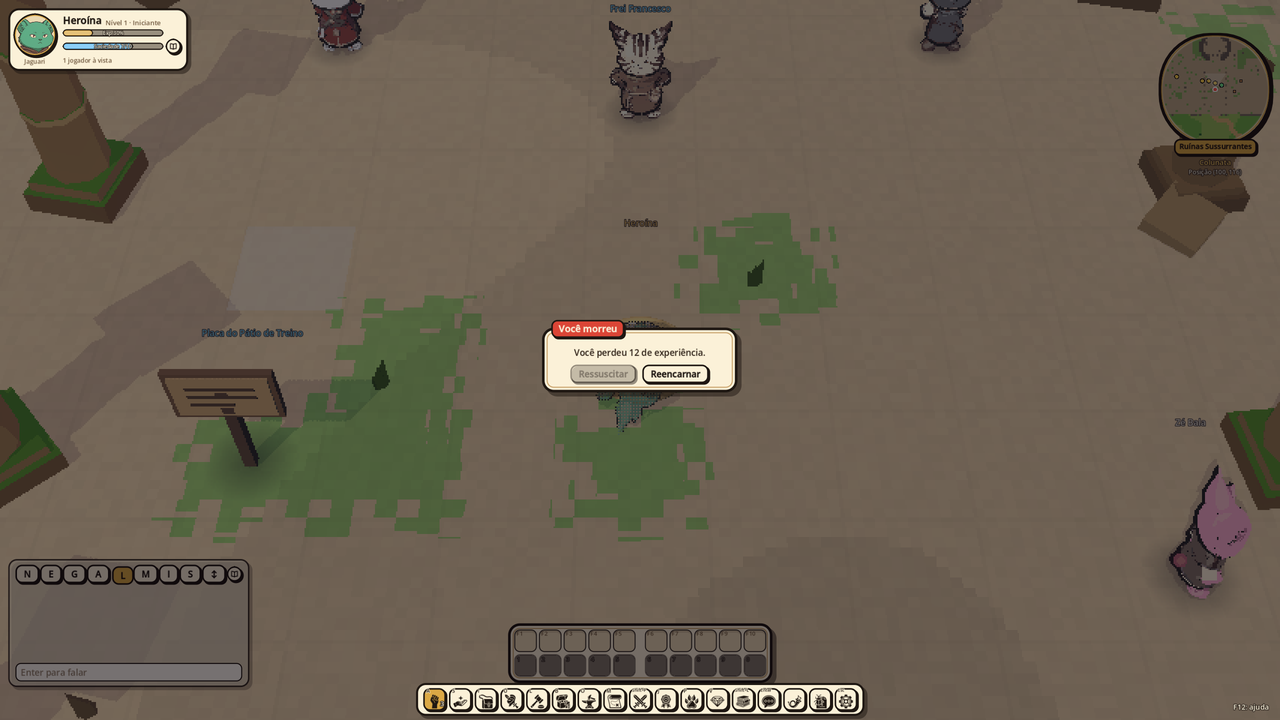
- Dying: you lose 10% of the experience the level needs to go up, without the bar going below 0. You never lose a level, and your attributes and skills stay as they are. With the bar at 90%, it drops to 80%; with less than 10%, to 0. With the Blessing of Vitta in your bag, the death window offers Use the Blessing of Vitta: you come back right there, without losing the experience.
- Reincarnating and the return point: when you reincarnate, you wake up at your return point (with none saved, at the start of the Ruins), with half your HP and MP. There are two ways to save it:
/sr(or/salvar_retorno) in the chat saves the spot where you are, for free, on any open map. It doesn't work inside houses and dungeons, in combat or in a fight against another player.-
At the inn (Innkeeper Nora Pellegrini, in Whisper Village): at the end of the conversation, she asks how many days of lodging you want, from 1 to 7, at M$ 1 a day, paid on the spot. With the room paid, you reincarnate at the inn's door with full HP and MP. Paying again adds the new days to the ones left. When the days run out, the return point stays there, just without the rest.
-
Hunger: a sentient needs to eat once a day. The satiety bar, under your name, goes from 0 to 10: when full, it empties in 4 hours of play, hunting or standing still (outside the game, ten times slower: in 40 hours), and it turns sky blue when you have eaten that day (amber when you haven't yet). The cook's and the alchemist's foods fill the bar (Wheat Bread 4, Hyena Skewer 5, Boar Stew 8, Honey Bread 4), heal a little and give a buff for 30 minutes of play, which carries on when you leave and come back: Wheat Bread regenerates HP faster, the Skewer gives attack, the Stew gives defense and max HP, and Honey Bread regenerates MP faster and gives magic attack. Only one food buff works at a time; eating another food swaps the buff. Well-made food gives a bigger buff. Innkeeper Nora Pellegrini sells Wheat Bread, and Friar Francesco, at the start of the Ruins, gives you one a day up to level 20.
- With the bar at 0, you are hungry: the bar turns red, an empty bowl appears above your head, and for each day of hunger your defense, attack, and attack and movement speeds drop 5%, down to 30%. Outside the game, the bar drops too, more slowly: if you leave with it full and come back after 40 hours, your sentient will be hungry. Eating any food ends it, and so does reincarnating at the inn with a paid room.
- On the 7th day of hunger, the sentient hibernates: it leaves the game and goes back to the return point. When you log in again, you have 30 minutes to eat; if you don't eat, you are logged out again and go back to the return point. While hibernating, you can walk freely to someone who sells food, even on another map, but you cannot fight or use skills and items (only food); in return, neither monsters nor other players attack you.
- Day and night: Paroi time is the clock time in GMT. Day runs from 6:01 to 18:00 and night from 18:01 to 6:00 (in Brasília, night starts at 15:01 and day at 3:01). A sun or a moon next to the date, under the minimap, shows the period, and
/hojetells you the time. At night, the world gets darker (house interiors don't), the music changes and some monsters change their behavior: nocturnal ones, like the Spitting Hyena, only attack those who come close at night; by day, they stay quiet, but they strike back if hit. Diurnal ones do the opposite. - Phases of the moon: each week of the Paroi month has its own moon, and the moon changes the light at night. In the first week the moon is full (the brightest night); in the second, waning (75% of the light); in the third, new (the darkest night, with half the light); in the fourth, waxing (75%). The goddesses' days, outside the months, have a full moon. The moon under the minimap shows the phase (a disc when full, a "D" when waning, a dark disc when new and a "C" when waxing), and
/hojegives its name. Some missions and some monsters will only appear under one moon.
7. Items, equipment and money
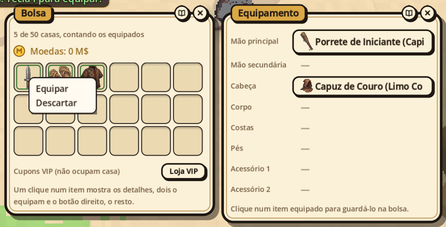
- Bag (I): monsters drop items, which go to whoever contributed most to the fight. Identical items stack.
- Equipment (U): weapon, shield, hood, doublet, cape (on the back, over the doublet), sandals and two accessories (rings, earrings, pendants: any of them in either slot). Each item shows its bonus, and some require a level or a class.
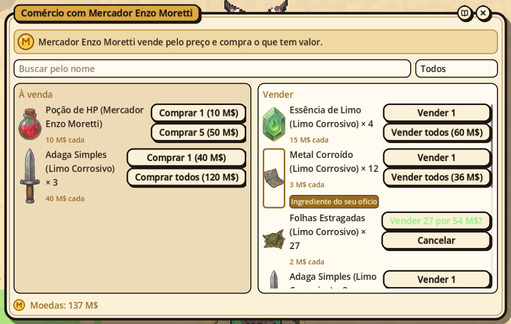
- Merchant Enzo Moretti: buys your items and sells potions and basic materials. He resells what he bought from other players.
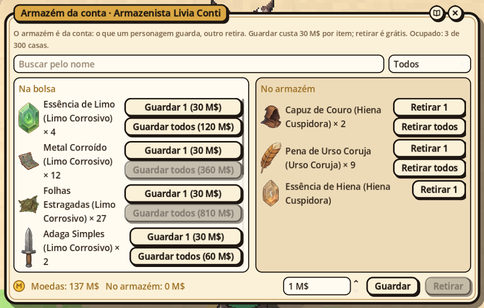
- Storage (the twins Livia Conti, in the Ruins, and Lucia Conti, in the Whisper Village Market): there is only one storage, and either of them opens it. It keeps items and coins for all the characters on your account. Storing an item is free up to level 20, costs 10 M$ from 21 to 100 and 30 M$ above 100; withdrawing is free, and it holds 300 stacks. Coins are stored and withdrawn for free: type the amount at the bottom of the window and click Store or Withdraw. This is how one character passes money to another on the same account. Whatever comes from the auction (items and coins) also arrives here.
- The game's money is Muggys (M$).
- One window at a time: opening a window (bag, skills, map, shop, trade...) closes the one that was open. The bag and the equipment are the exception: they open and stay together, because you equip by double-clicking in the bag. The chat, the minimap and NPC conversations never close because of this.
- Windows hold the mouse: with a window open, the world behind it doesn't respond to the mouse (clicks, the wheel and right-click); the chat and the bottom bar do. Esc closes the open windows.
VIP Coupons
A VIP Coupon is an extremely rare ticket, with a color and a number, that monsters drop. Each coupon is worth one use; identical ones stack, and the number on the stack is the number of uses left.
- How rare: every monster that drops loot, from the slime to the boss, can drop a coupon, with the same chance: 1 in 10,000. It is a single roll per monster killed, and the type is drawn among the twenty, all with the same chance. Nothing changes that chance: not the GMs' drop events, not the drop coupons. The Training Totem drops no coupons.
- Only from a monster that still gives you experience: a monster 20 levels or more below yours, which no longer gives experience, drops no coupons either. Sweeping weak monsters doesn't pay.
- Non-transferable: the coupon belongs to the character who got it in the loot. It can't be sold to the merchant, and it doesn't go to the auction or to any storage ("This item is yours alone: it can't be sold, auctioned or put in any storage."). You can only use it or throw it away.
- A row of their own in the bag: coupons sit in their own grid, VIP Coupons (take no slot), below the items. They don't count toward the bag's 50 slots: with the bag full, a coupon that drops still goes in.
- The coupon's tooltip (hover the mouse over it) tells you how it works, how many uses the stack has and that it belongs to the character alone.
- The VIP Shop: coupons can also be bought. Press V, or click VIP Shop on the bottom bar or on the coupon row of the bag: the shop opens anywhere. At the top is your balance of VIP Points, which belong to the account (all your characters spend from the same balance) and are acquired outside the game; in this testing phase, they are being given out for free: each account received 100. Click a coupon's card to read what it does, choose how many (up to 10 identical ones per purchase) and click Buy and Confirm the purchase. The cheapest, the Teleport one, costs 1 point; the most expensive, those of Attributes, Name and Class, 20. A bought coupon belongs to the character who bought it, and a timed one turns on as soon as it enters the bag.
| No. | Coupon | What it does | How it works |
|---|---|---|---|
| 1 | VIP Coupon of Teleport | Casts Teleport while it is still on cooldown | spent by itself, per use |
| 2 | VIP Coupon of Speed | Your pace at the maximum for 12 hours of play | turns on by itself, timed |
| 3 | VIP Coupon of the Pet's Name | Changes the pet's name after its first name | spent by itself, per use |
| 4 | VIP Coupon of Pet Experience | The pet gains the experience its owner gains, for 12 hours of play | turns on by itself, timed |
| 5 | VIP Coupon of Double Experience | Double experience for 12 hours of play | turns on by itself, timed |
| 6 | VIP Coupon of Double Drop | Double drop chances for 12 hours of play | turns on by itself, timed |
| 7 | VIP Coupon of Triple Experience | Triple experience for 6 hours of play | turns on by itself, timed |
| 8 | VIP Coupon of Triple Drop | Triple drop chances for 6 hours of play | turns on by itself, timed |
| 9 | VIP Coupon of Colors | Changes the character's color to any color of their race, including the extra colors | active: you use it |
| 10 | VIP Coupon of the Name | Changes the character's name | active: you use it |
| 11 | VIP Coupon of Class | Changes class | active: you use it |
| 12 | VIP Coupon of Attributes | Gives back all the attribute points | active: you use it |
| 13 | VIP Coupon of the Trade | Changes trade without losing the level | active: you use it |
| 14 | VIP Coupon of the Oath | Leaves the oath without the mark of leaving | active: you use it |
| 15 | VIP Coupon of Storage | Opens your storage wherever you are, for 10 minutes | active: you use it |
| 16 | VIP Coupon of Protect | Protect running without the skill for 12 hours of play, and death doesn't take it away | turns on by itself, timed |
| 17 | Blessing of Vitta | In the death window, you come back right there, without losing the experience | active: in the death window |
| 18 | Blessing of Labris | +30 to the chance of the next crafting, refining, socketing or enchanting | active: you use it |
| 19 | Blessing of Juno | Your pet doesn't go below 1 HP, for 1 hour of play | active: you use it |
| 20 | Blessing of Sonata | The next bard teaches you his family on the spot | active: you use it |
When a coupon drops, you get one or a small stack: 1 to 10 for the Teleport, Pet Experience and Storage coupons; 1 to 4 for the Speed coupon, the Protect coupon and the experience and drop coupons; just one for the others.
The timed ones (2, 4, 5, 6, 7, 8 and 16) turn on by themselves.
- As soon as the coupon enters your bag, one leaves the stack and the effect starts: "VIP Coupon on: … It lasts 12 h of play."
- These are hours of play: the clock only runs while the character is in the world; out of the game, it stops. The effect doesn't end when you die. When you log in, the chat reminds you how much is left ("VIP Coupon active: … 3 h 20 min of play left.") and, at the end, tells you ("The VIP Coupon ran out: …").
- The tickets that are running show up, small, to the right of the character's frame, each with the time left.
- One per effect at a time. Double and triple experience are the same effect, and so are the drop ones: the strongest turns on first (triple before double), and the next one in the bag turns on by itself when the previous one ends. Different effects run together: experience with drop, for example.
- With a GM event, it multiplies: the coupon's double on top of the event's double makes four times.
- The experience (5 and 7) applies to experience from monsters, from missions and from NPC rewards. The drop (6 and 8) applies to all the loot you receive, except the roll for the coupons themselves. The speed (2) is that of the Agility Potion, but it doesn't end when you die.
- Protect (16): while the coupon runs, Protect works without you casting the skill, from the moment the coupon turns on, without the 30-second wait, and death doesn't take it away: it takes nothing, not even the coupon. Experience pays the same price as Protect (98% from level 50 on).
The per-use ones (1 and 3) are spent by themselves, at the moment they are needed.
- Teleport (1): with the skill ready, Teleport goes off as always, without spending a coupon. With the skill still on cooldown and the coupon in your bag, Teleport goes off anyway and spends one ("VIP Coupon spent: Teleport without waiting for the cooldown."); the cooldown starts again from there.
- Pet's name (3): the first name you give your pet is free. From the second change on, Rename spends a coupon and, without one, refuses.
The seven active ones (9 to 15) you use whenever you want. Double-clicking the coupon in the bag (or Use, in the right-click menu) opens the coupon window: it tells you what the coupon does, asks for your choice and only spends it in two clicks, Use the coupon and then Confirm: the coupon is spent.
- Colors (9): each coupon is one change, to any color of the character's race, including the extra colors (the patterned ones of the Jaguari and each race's own), which creation doesn't offer.
- Name (10): the window asks for the new name, by the rules of creation. When you confirm, you are disconnected; when you log in again, the new name is already in place. The player name, the surname, doesn't change.
- Class (11): changes to another class that comes from the same class as yours (among Mage, Warrior, Priest and Acrobat, for example), without checking the requirements. The old class's skills are forgotten, and the points spent on them come back. Level, attributes and items stay; equipment the new class can't use goes back to the bag. A Novice can't use this coupon: they choose their first class with the master.
- Attributes (12): all the attribute points become free again, at any level and class, for you to distribute anew.
- Trade (13): changes line (the blacksmith becomes an alchemist; the artisan, a cook) keeping the trade level and experience; the regular change resets everything. The new trade's skills start at level 1, and the points spent on the old ones come back to be spent.
- Oath (14): leaves the oath without the mark of leaving, without becoming a target and without the wait to swear again. To swear to another order, look for its NPC, by the usual rules.
- Storage (15): opens the account storage wherever you are, away from the storekeepers, for 10 minutes; using another coupon while it is open restarts the time. Storing and withdrawing cost the usual. The association's storage is still only at its chest.
The blessings (17 to 20). With a blessing running, another of the same kind can't be used: the coupon stays in the bag ("You already have a Blessing of Labris running."). The ones running show up to the right of the character's frame, with the tickets of the timed coupons: Juno's with the time left; Labris's and Sonata's, which wait for their moment, with just the ticket.
- Vitta (17): it isn't used from the bag: with it in the bag, the death window shows the Use the Blessing of Vitta button on every death outside PvP and the arena (not on the Sacrifice, which already revives by itself). You come back right there, with the HP of the Tear of Vitta and the MP you had, and the experience the death took comes back; the buffs don't. It doesn't go on the coupon bar.
- Labris (18): the next crafting, refining, socketing or enchanting that can fail gets 30 points of chance (60% becomes 90%), up to 95%. It waits for that action, even if you leave the game, and is spent whether it works or not; with the chance already at 95%, or on an action that always works, it isn't spent. The trade windows already show the chance with it. In the forge service, the blessing that counts is the one of the blacksmith doing the service.
- Juno (19): for 1 hour of play, your pet doesn't go below 1 HP. Without a pet, the coupon stays in the bag; with the pet put away or knocked out, it works.
- Sonata (20): the next bard among those who teach playing that you talk to teaches you his family on the spot, without the instrument or the witnesses' stories. If you already play his family, he tells you so, and the blessing keeps running for another bard.
The coupon bar (Shift+1 … Shift+0). Active coupons have a bar of their own, right above the skill bar (1 … 0) and the item bar (F1 … F10). It only shows up when there is an active coupon in the bag; the Blessing of Vitta doesn't go on it.
- There are ten slots, on the keys Shift+1 to Shift+0. Each type of active coupon stays in the slot it took, with the uses left in the corner.
- The key, or a click on the slot, opens the coupon window, the same one as double-clicking the coupon in the bag: it tells you what it does, asks for your choice (the class, the trade, the color, the name) and for the two-click confirmation.
- No coupon is spent by the key alone.
8. Trades: crafting
Each character has their own trade: characters on the same account can have different trades. To learn one, talk to Blacksmith Marco Galli (weapons and equipment) or to Alchemist Rosa Esposito (potions and food), on Baron's Road, right where you arrive from the Ruins by the east road. At trade level 10, the master offers the next step up.
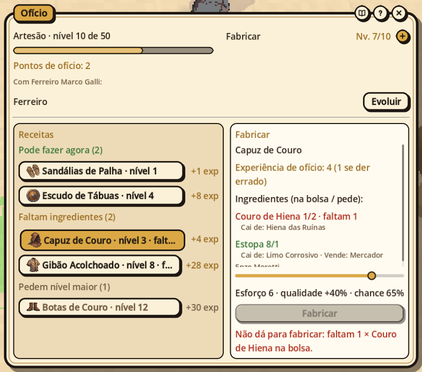
- Open the trade window with the O key. At the top, your trade: its level, experience and trade skills. Below, two sides: on the left, the recipes, in three groups (can make now, missing ingredients and need a higher level), each with the trade experience it teaches ("+8 exp"); on the right, Craft, with the chosen recipe, the ingredients, the effort and the button. Each ingredient tells you where it comes from: which monster drops it and who sells it. A recipe far below your trade level teaches little.
- To craft, you need the recipe's trade level, the ingredients loose in your bag (equipped ones don't count) and to be out of combat.
- Effort: from 1 up to the skill level. More effort gives the item more quality, but less chance of success. If it fails, the ingredients are lost, and you gain a little experience.
- A base recipe (the base material becomes the common item) always succeeds and gives no experience.
- Labris, the Goddess of Trades: when crafting, refining, socketing or enchanting succeeds, a glow rises from your hands (only you see it). On an exceptional craft or refine (with a 5% chance or less, with a rare material, like the labrisite and orichalcum for refining to +5 and above, or with an epic item), Labris herself appears behind you, in view of everyone, striking the hammer on the anvil or pouring one flask into another.
- Each trade level gives 1 point to raise a trade skill (the + button).
- The trade also levels up the character: each craft gives the character a little experience, in proportion to the trade experience it teaches. A whole trade level is worth 5% of what your level needs to go up.
- The window's ? button sums up these rules.
Improving and enchanting your equipment
- Forge (blacksmith): in the trade window, the Forge button opens refining (+1 to +10) and socketing essences into the items in the blacksmith's bag. Up to +3, refining always succeeds. On a failure, the item goes back one level and never breaks.
- Asking a blacksmith or an alchemist for the service: a non-blacksmith can ask for refining or socketing, and a non-alchemist can ask for an oil, without handing over the item, which never leaves your bag. 1. Stand near the crafter (up to 5 cells) and right-click them: Request refine or Request socket, from the blacksmith, or Request oil, from the alchemist. 2. Your bag opens with it. Double-click the item and confirm. 3. The crafter chooses the price and where the material, the essence or the oil comes from: their bag or yours. 4. You see the price and the terms and accept or decline. When you accept, the M$ leave your bag and go to the crafter before the service, whether it succeeds or not.
- Each step waits 60 seconds for an answer; with no answer, the request is canceled. Either of you can back out before that.
- If you don't have the M$ for the price, the crafter is told and can change the price or cancel.
- If the crafter declines your request, you can only ask them again after 2 minutes. You can ask another crafter right away.
- Oils (alchemist): the alchemist distills Fire Oil, Water Oil, Earth Oil and Electric Oil, and only they can apply it: to the weapon or armor in their own bag (double-click the oil) or, through the service, to one in another player's bag. The oil always takes, and the item is of that element forever:
- the weapon deals 50% more damage to monsters weak to that element;
- the armor protects against the same element and makes you weak to the element that beats it.
- Balms (alchemist): each balm adds a bonus to one of your equippable items for a while, from a few hours up to 24 hours. The higher the trade level, INT and VIT of the alchemist who made it, the longer it lasts, and the name tells you how long: "Attack Balm (Rosa) 7h18". The effort they chose raises the bonus. The bonuses are attack, magic attack, attack or movement speed, accuracy, evasion, defense, critical, max HP or MP, or HP or MP regeneration.
- The time runs even while you are out of the game.
- The first balm on an item always takes. The second, of another type, has a 50% chance, the third 25%, and so on. On a failure, the balm is lost.
- A balm of the same type replaces the one already on the item and restarts the time.
- To use a balm (or, as an alchemist, to apply an oil), be out of combat. The item's details show the element and each balm, with the time left.
Example: Straw Sandals from scratch
As an Artisan, Straw Sandals take 1 Common Sandals (the base) and 3 Tow:
- The base material: Merchant Enzo Moretti sells Sandals Base Material, and the Training Totem drops it (1 in 8).
- The base: craft the Common Sandals with the material. It's a base recipe: it always succeeds.
- The tow: drops from the Training Totem (1 in 11). The window shows "Tow 1/3 · 2 missing" until you have all three.
- The sandals: choose the effort. With effort 1, the chance is high and the quality low. More effort gives better sandals, but if it fails, the base and the tow are lost.
Musical instruments (T key)
Whoever has learned to play from a bard holds the instrument in both hands and plays: while the music lasts, the player and the party nearby gain a bonus, and the monsters in range get weaker. Music costs breath (MP and, after that, HP) and wears out the instrument.
Learning from a bard. There are three bards, each with their own family of instruments. Whoever learns a family plays all its instruments, forever. Any character can learn, of any class, with or without a trade.
| Bard | Family | Where |
|---|---|---|
| Bard Remo Ravelli | percussion: the drum, the bongos and the cuíca | Baron's Road, where you arrive from the Ruins, by the blacksmith and the alchemist |
| Bard Selene Cantini | wind: the flute and the ocarina | Pedravale, in Stone Square |
| Bard Leandro Monti | strings: the guitar, the banjo, the harp and the lute | Whisper Village, in Boundary Stone Square |
- Ask for the lesson ("I want to learn"): the bard says what they want, and you become an apprentice.
- Bring an instrument of the family, in your bag or in your hands. Only a blacksmith makes it (see Who makes them, below).
- Hear the story from three witnesses, each in a different place: Washerwoman Zita Riva (Whisper Village, near the market), Carter Ivo Tedesco (Pedravale, in the Sunset Quarter) and Old Imelda Cocci (Baron's Road, facing the bard). A ! appears over whoever still has something to tell, and the chat counts the parts ("Mark: Heard the Story of the Drum (2).").
- Go back to the bard with the instrument and the three parts: the bard teaches you, and you gain the family's mark ("Plays Percussion").
The lesson doesn't show up in the Missions tab (J key): in each conversation, the bard tells you what is missing.
Playing and stopping.
- Equip the instrument: it goes in the weapon hand and takes both hands; the shield comes off. If you haven't learned the family, the key refuses: "You haven't learned to play this instrument yet. Find the bard who teaches it."
- Play with the T key, or with
/tocarin the chat, standing and still. The same key stops the music. - Any action also stops the music: walking, attacking, casting a skill, sitting, taking the instrument off, leaving the map or dying. Taking a hit does not stop it, and neither does drinking a potion.
- Every 4 seconds, a ring of light runs along the ground as far as the music reaches (copper for percussion, blue for wind, lilac for strings). A note appears among the signs of whoever hears it and, in red, over the monsters it weakens. Once the music stops, the effect ends within 6 seconds.
What each instrument does. The level is the one the character needs to equip it.
| Family | Instrument | Level | Whoever hears it gains | The monsters in range lose |
|---|---|---|---|---|
| Percussion | Drum | 10 | attack +6 | defense −8% |
| Percussion | Bongos | 13 | attack speed +8% | attack −8% |
| Percussion | Cuíca | 16 | critical +4% | defense −12% |
| Wind | Flute | 10 | HP regeneration +2 | attack −8% |
| Wind | Ocarina | 14 | movement speed +8% and evasion +8 | magic attack −10% |
| Strings | Guitar | 10 | defense +6 | attack −6% and magic attack −6% |
| Strings | Banjo | 12 | accuracy +10 | defense −10% |
| Strings | Harp | 15 | MP regeneration +2 | magic defense −10% |
| Strings | Lute | 17 | magic attack +8 | magic defense −12% |
- Alone: the bonus applies to you, and the monsters around get weaker. But with both hands on the instrument, you don't strike.
- In a party: the bonus applies to you and to the party members in range. The musician trades their own damage for everyone's bonus: the bigger the party, the more the music is worth.
- One music at a time: whoever already hears a music stays with it while it lasts; another musician's only comes in when the first one stops. Whoever plays always hears their own.
- Weakening is not attacking: the reduction doesn't pull the monster into the fight, and it works on bosses too.
- The range is 4 cells, plus 1 for every 15 points of the instrument's quality: 5 cells at quality +15%, 8 at +60%. Quality does not raise the bonus: what changes the bonus is the instrument.
- Between players: in a fight against another player (an open fight or a duel), the music only applies to whoever plays, and it weakens no player. In the association championship, it applies to the team nearby, and the opponents standing in range suffer the same reduction as monsters ("Opposing music: Drum").
- In events with
/auto: a companion who comes in with an instrument equipped, of a family they have learned, plays during the party's fight and stops when it ends. - Sonata, the Goddess of Song, appears behind whoever starts playing an instrument of quality +50% or more, in view of everyone, at most once every 30 minutes per musician.
The cost and the wear.
- Breath: for each minute playing, 10% of max MP; the first minute is paid when you start. Without MP for the minute, the music starts costing 5% of max HP. It never kills: with HP at 10% or less, you stop ("You ran out of breath: the music stopped.").
- While playing, HP and MP don't come back on their own. Potions, food and someone else's healing still work.
- Wear: the instrument counts the minutes played, and its tooltip shows how much is left. It lasts 20 hours of music, plus half an hour for each point of quality: one of quality +60% lasts 50 hours. At the end, it falls apart in your hands, with a warning. There is no repair: the blacksmith makes another.
- The instrument can't be refined or socketed with essences.
Who makes them. Instruments don't drop from monsters: only the blacksmith makes them, from trade level 10 to 17, and every recipe takes an Amber Varnish, which only the alchemist distills (trade level 11). The instrument comes out with the quality of the effort and the blacksmith's signature: "Guitar (Marco)". The recipes are in the Blacksmith's manual, and the varnish recipe in the Alchemist's manual, both in Portuguese.
The homunculus
The Lesser Homunculus is a small, short-lived being that fights for you: it goes to the front, takes the hits in your place and, within minutes, falls apart. It is not a pet: it has no name, hunger, love, level or window, and it doesn't come back.
- The cocoon and the homunculus: the blacksmith forges the Copper Cocoon (trade level 11), and the alchemist distills the homunculus inside it (level 13). One trade can't make it without the other, and each homunculus uses up one cocoon. The recipes are in the Blacksmith's manual and in the Alchemist's manual, both in Portuguese.
- Any character can use it, of any class. Before it is awakened, the item can be traded and goes to storage and to the auction.
- How long it lasts: from 12 to 30 minutes. The time comes from whoever distilled it (the higher the alchemist's trade level, INT and VIT, the longer the homunculus lives), and the item's name says it: "Lesser Homunculus (Rosa) 17 min".
- Awakening: double-click the item in your bag, out of combat (5 seconds without trading blows) and out in the field: it doesn't awaken in town, indoors or where players fight each other. The item is used up, and the chat tells you: "Lesser Homunculus awakened and fights for you for 17 min."
- One per character: to awaken another, dismiss the first. The homunculus and the pet can walk together.
- How it fights: it follows you two cells away and attacks your target and whoever attacks you or it. It never starts a fight on its own; on
/afk, it only attacks whoever attacks you. It has only the basic melee hit, and it doesn't heal or buff. Aggressive monsters target it, and the monster it hits strikes back at it. Experience and loot count its damage as yours. - Its strength: its level is yours, up to 60; above that, it fights as at 60. It has 48% of the HP and 40% of the attack of a regular monster of that level, and the item's quality (the alchemist's effort) raises both.
- Healing: it receives your healing and the party's (the Priest's Heal, for example). Potions don't work on it, and the Tear of Vitta doesn't raise it.
- The clock: under its HP bar, the line "Ana's · 16 min" says whose it is and how much is left; in the last minute, it counts the seconds.
- The end: it falls apart when the time runs out or its HP reaches 0, and it leaves nothing behind. It also falls apart if you die, leave the game or switch characters, and when it enters town, an interior or a place where players fight each other with you ("Lesser Homunculus fell apart: it cannot enter here."). From one field map to another, it goes with you, with the HP and the time it had.
- Dismiss: right-clicking it only offers Dismiss; once dismissed, it disappears and doesn't go back into the cocoon.
- With other players: it doesn't attack players, and they can't attack it or click it. It stays out of the association championship.
Jewels
Jewels are accessories that don't help in a fight: they make you grow faster or find more loot. They go in one of the two accessory slots (U key), in place of a fighting ring: the choice is between growing faster and fighting better.
The stone sets the bonus, and the metal, its size. The ring with Ruby gives monster experience; the pendant with Amethyst, drop chance.
| Metal | Level to wear | Ring with Ruby: experience | Pendant with Amethyst: drop |
|---|---|---|---|
| Silver | 10 | +3% | +3% |
| Gold | 30 | +5% | +5% |
| Labrisite | 60 | +8% | +8% |
| Orichalcum | 100 | +12% | +12% |
- Experience (Ruby) adds to the GM event's percentage: with no event, the +5% ring makes 105%; in a 200% event, 205%. It only counts for monster experience, after the level penalty: not for crafting, quest or trade experience, nor for your pet's.
- Drop (Amethyst) raises the drop chances of the monster whose loot you get, on top of the GM event: in a 200% event, the +5% pendant makes 210%.
- Jewels stack: two rings with Ruby, one in each slot, add up their bonuses, up to the cap of +100% experience and +100% drop per character.
- Quality raises the bonus, as with everything crafted: an Orichalcum Ring with Ruby of quality +50% gives +18%.
- Where to see it: the item's tooltip, in the bag, shows the bonus. With the jewel on, the attributes window (A key) shows, in the combat section, "Monster experience +5%" and "Drop chance +5%"; the lines only appear for those who have one of these bonuses.
- In a party, each brings their own: the experience one counts on your share of the experience, and the drop one, when the monster's loot goes to you. The
/autocompanions use the jewel they wear. - Jewels can't be refined, like every accessory, but they take socketed essences, like every equippable item: that's the way to give them some stats.
Who makes them. Jewels don't drop from monsters: only the blacksmith makes them, from trade level 12 to 40, and every recipe takes a Polishing Paste, which only the alchemist distills (trade level 11). The jewel comes out with the quality of the effort and the blacksmith's signature: "Gold Ring with Ruby (Marco)". The recipes are in the Blacksmith's manual, and the paste recipe in the Alchemist's manual, both in Portuguese.
Where the stones come from. Ruby and Amethyst are rare and go to the auction. Ruby drops from the Imp, the Armored Boar, the Ember Salamander, the Boitatá and, more often, the Imp Chief; Amethyst, from the Spitting Hyena, the Owlbear, the Hook-Horn Goat, the White-Beard Goat and, more often, the Great Owlbear. The Amethyst Shard from the Hook Range is a different stone: it's only for selling. The metals drop from monsters too: silver and gold from many, and labrisite and orichalcum, rare, mostly from bosses.
Traps
The smith forges three traps, each with the charge made by the alchemist: you set them on the ground, and the first monster that steps on one sets it off. Single use: once it goes off, it falls apart. The recipes are in the Smith's manual and in the Alchemist's manual, both in Portuguese.
| Trap | What it does to the monster that steps on it |
|---|---|
| Jaw Trap | it is held for 4 s: it can't move, but it attacks whoever is next to it. It gives the Mage time and lets the party hit a monster standing still. |
| Spike Trap | it takes damage at once and is poisoned for 10 s |
| Powder Trap | it explodes: the bigger damage on the one that stepped on it and a smaller one on the monsters within 1 cell of it |
- Setting it: double-click the trap in your bag (or its shortcut on the bar), then click a free cell up to 2 cells away. You stand still for 2 seconds; walking cancels it, and the item stays. Once set, it leaves your bag, and the chat says: "Jaw Trap is set."
- Where: in the field and in dungeons; not in town, indoors, where players fight each other or in the arena.
- Who sees it: only you and your party. Monsters don't avoid it.
- Who sets it off: only monsters. You, other players, your pet and the homunculus walk over it.
- Its strength: the damage comes from the attack of a common monster of your level, up to 60; the smith's quality raises the damage and the time held. Bosses resist: half the time held and half the damage (mini-bosses don't).
- The fight is yours: the monster it hits comes after you, as if you had struck it, and experience and loot count the trap's damage as yours.
- Up to 3 set per character, alongside the homunculus and the pet; the fourth is refused.
- Picking it up: click the set trap, standing next to it; it goes back to your bag. Only whoever set it can pick it up.
- It vanishes by itself after 5 minutes set, and if you change maps, die or leave the game; a trap that vanishes this way is lost.
9. Party
- Inviting: right-click the player, or type
/convidar Namein the chat (/convidar Name Surname, if there are two with that name). To leave,/sairgrupo. Someone who is fallen (dead, until they reincarnate) can't receive an invitation: wait for them to reincarnate. - Talking only to the party:
/g text. The G key shows the party panel, with each member's HP. - The party lasts from one day to the next: whoever closes the game, drops their connection or updates the game stays in the party, grayed out on the panel, marked "offline", and comes back to it on logging in. While away, they gain no experience or items and don't read the party chat. If the leader leaves the game, someone who is playing becomes the leader. The party disappears when only one member is left, or when none of its members logs in for 7 days. The leader can kick out someone who is offline (
/expulsar Name). - Sharing experience and items: in equal shares, if the levels are close (up to 10% apart), or by contribution (whoever hits, takes hits and heals gets more). The leader chooses. If your bag is full, the item goes to another party member who is nearby.
- Stepping away without leaving your character:
/afk. Your character sits where they are, everyone sees a ". . ." above their head, and they defend themselves on their own: they strike back at whoever attacks, heal, drink potions and return to their spot. Meanwhile, they gain no experience or items from monsters. To come back, walk, attack or type/afkagain. If they die, it's a normal death. - At events, playing alongside your other characters: at some events, the GMs turn on
/auto, which brings other characters from your account to play by your side, in your party. The announcement comes out in the global chat, with how to use it; outside events, it isn't available.
10. Auction
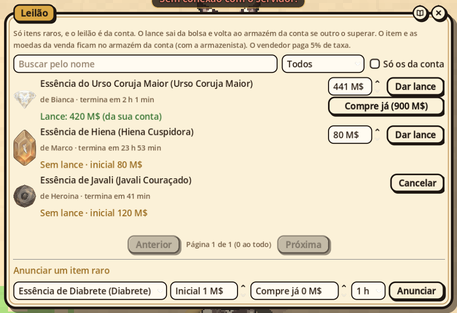
Rare items (the ones monsters drop with a low chance, and bosses' drops) are sold at the auction (L key, from anywhere). The merchant doesn't buy them.
The auction belongs to your account, not to the character: any of your characters sees the account's listings and bids as their own, and everything the auction delivers goes to the account storage, never to the bag.
- Listing: choose the item from your bag, the starting price and the duration (1 h, 6 h, 1 day, 3 days or 7 days). Each account can have up to 10 open listings.
- Bidding: a bid takes the coins out of the bidder's bag, right away. If another player outbids you, the coins go back to your account's storage. You can't bid on a listing from your own account.
- Winning: whoever has the highest bid at the end takes the item, which shows up in their account's storage. Withdraw it with the Storekeeper.
- Selling: the coins from the winning bid, minus a small fee, go to the storage of the account that listed it.
- A listing with no bids goes back to storage when its time runs out. Before the first bid, any character on the account can cancel it, and the item also goes to storage.
- Deleting a character doesn't affect the account's auctions: they carry on and deliver to storage.
Example: listing a rare essence
You got a Great Owlbear Essence, which the merchant doesn't buy. At the auction, choose the essence, set the starting price (for example, 300 M$) and the duration (24 h) and click List. The essence leaves your bag. Whoever has the highest bid at the end takes the item, and the coins, minus the fee, arrive in your account storage: withdraw them with one of the storekeepers (Livia, in the Ruins, or Lucia, in the Village), with any of your characters, or through the Bank (B key), from anywhere. With no bids, the essence goes back to storage.
Bank (B key)
The Bank shows your coins (M$) in the two places they are kept: in the bag of your character and in the account storage, which all your characters share. It opens from anywhere, with the B key or the Bank button on the bottom bar.
- Balances and statement: each side shows the balance in large type and the latest coin movements (sales, purchases, what you stored, what you sent and received), with the date and the amount, in green when it comes in and in red when it goes out.
- Store and Withdraw: move coins between the bag and storage, for free, without having to go to the storekeeper (items still stay with her).
- Sending M$ to another player: write the name and surname of their character (the surname is their player name, which appears above their head) and the amount, and press Send…. The game shows their class and the fee for you to check; only then press Send. The coins arrive in their account storage, even if they aren't in the game, and they get a notice in the chat.
- The rules for sending: the fee (currently 5%) comes out of your bag, on top of the amount; each transfer can be up to half of the smaller balance, the bag's or the storage's (so keep some coins in storage first); and each account can send once per hour. A transfer can't be undone.
Example: sending coins to a friend
Your bag has 1,000 M$. In the Bank, store 400 in storage: that leaves 600 in the bag and 400 in storage, and you can send up to 200 M$ (half of 400). Write "Bia Moeda", enter 100 and press Send…: the game shows "You are sending M$ 100 to the character Bia Moeda, of the Mage class" and the M$ 5 fee. Confirm: 105 M$ leave your bag, and Bia sees 100 M$ in her account storage.
11. Chat
| Command | What it does |
|---|---|
| Enter and the text | Talks to whoever is nearby (the speech bubble appears above your head) |
/s Name text |
Whisper to a player. If there are two with that name, write the surname too: /s Itatich NarutoRULEX hi |
/r text |
Replies to whoever whispered to you last |
/g text |
Talks in the party |
/a text |
Talks in the association channel (only members on its side read it; see Associations) |
/l |
Goes back to the local channel |
/bloquear Name · /desbloquear Name · /bloqueados |
Stops receiving someone's messages, or starts again. Someone blocked by many people is muted for a while |
/minimapa |
Shows or hides the minimap |
/goto [map] [X][,Y] |
Draws the blue dots of the path to cell X,Y. Without the map, the map you are on; without X or Y, the middle of the map: /goto alone leads to the middle of this map, /goto 50,30 to cell 50,30 and /goto Aurélia to the middle of Aurélia, through the exits of each map, like the world map path. Write the map by its name, with or without accents, or just its beginning |
/sr or /salvar_retorno |
Saves your return point where you are, for free (see section 6) |
/hoje |
The Paroi date, the game time (GMT), whether it is day or night and the phase of the moon (see section 6) |
/tocar |
Plays the instrument in your hands, or stops the music, like the T key (see Musical instruments) |
/casar "Someone" "Someone Else" |
Only for a Priest with the Curia's authorization: marries the two, who need to be near them (see Marriage) |
/relatar |
Opens the bug or suggestion report window, like the Report button (see Reporting a bug or an idea) |
/convites · /convites novo |
Only for those who played the pre-alpha: your three invitations to the alpha. /convites shows the ones you generated (who already joined, the ones still waiting for the guest) and how many you have left; /convites novo generates a link that is valid right away and creates a single account. The link appears only once: select it in the chat, copy it and send it. Whoever joins through your invitation gets no invitations, and a GM can revoke one that has not been used yet |
The chat takes up to 150 letters per message and 5 messages every 10 seconds. GM messages appear highlighted.
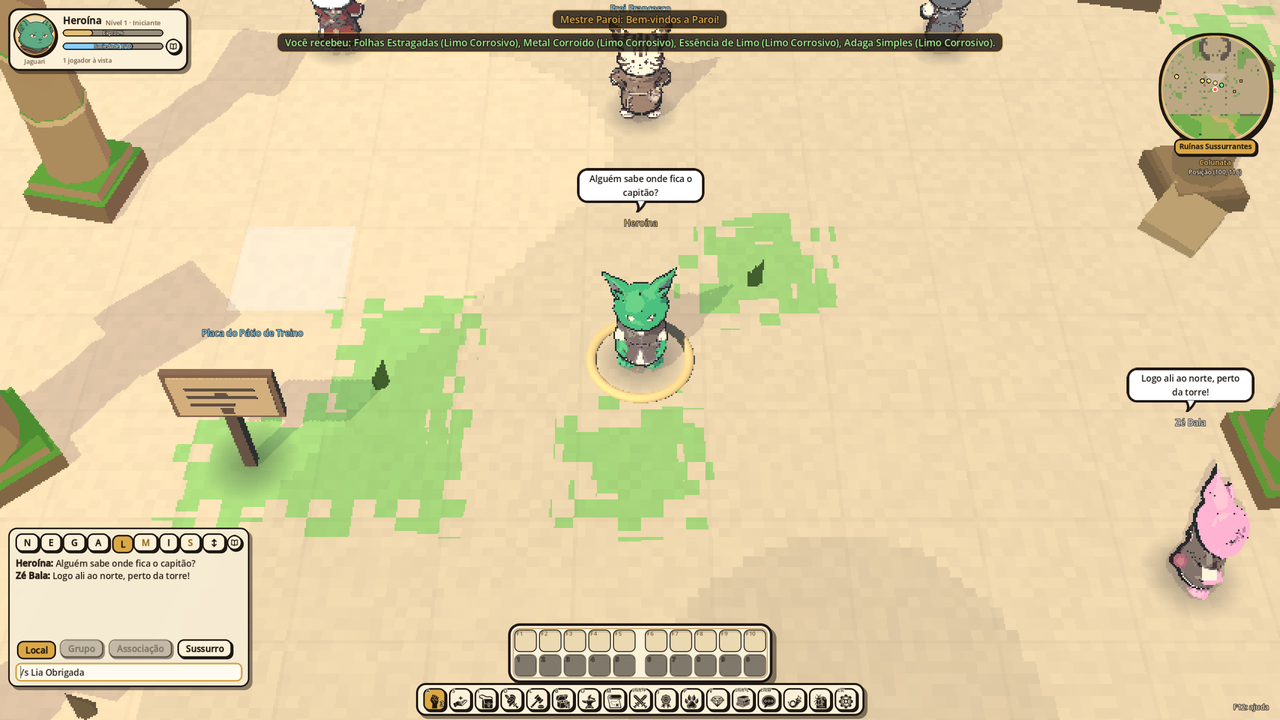
The chat tabs: above the chat, there is one letter for each type of message (the letters are the initials of the Portuguese names): N (what NPCs say), E (experience gained), G (the party), A (the association), L (what players nearby say; it is the starting tab), M (the world, the GMs' notices), I (items you gain) and S (whispers). Click a letter to see only that tab; when something arrives in a hidden tab, its letter turns gold. The game's own lines (a wrong command, a refusal) appear in all of them. The ↕ button changes the chat size: small (3 lines), medium (6) and large (up to the middle of the screen); the game remembers the size on this computer.
Example: a conversation
Does anyone know where the captain is?          (Enter and the text: local speech, with a bubble)
/s Lia I'll wait for you at the entrance        (whisper only to Lia)
/s Lia Lume I'll wait for you at the entrance   (the same, if there is another Lia)
/r on my way!                                   (replies to whoever whispered last)
/g heal, please                                 (only the party reads it)
/bloquear Zeca Chato                            (messages from Zeca, of the Chato house, no longer arrive)
/bloqueados                                     (shows who you have blocked)
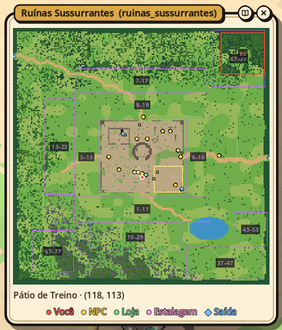
Use the map's level range to choose where to hunt: areas with your level inside the range are the ones that pay off without too much risk.
The world map (Shift+M)
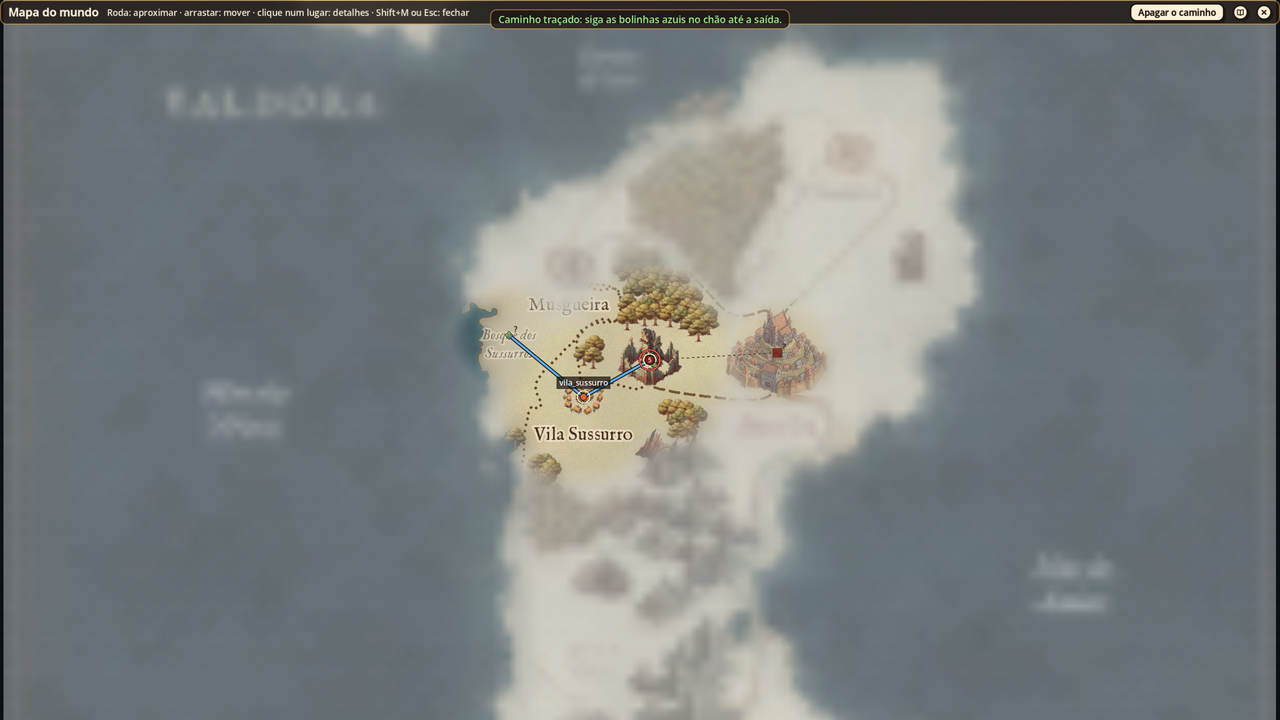
Shift+M opens the map of Paroi's two islands in full screen. A fog covers what you don't know yet: the land shows, the details don't. The places you have been to stay clear, and those linked to them by a road appear with a "?". The more you travel, the more the map opens up.
- The mouse wheel zooms in and out, and dragging moves the map.
- The blinking red ring is where you are.
- Clicking a place shows its type and the recommended level (the range of the monsters there) and offers Set the route: a blue line runs to it on the world map and, in the game, blue dots on the ground lead you, along the safe dirt roads, to the exit you should take; the minimap marks that exit with a blue ring and arrow. On each map, the guide moves on to the next exit, until you arrive.
- Clear the route, at the top, removes the guide.
Standing with the factions
Paroi's factions (the Anvil of the blacksmiths, the Still of the alchemists, the Counter League of the merchants, the noble houses, the Curia and the Inquisition, and those of Vésper) remember what you do for them. That memory is your standing: a number per faction, which starts at 0 and belongs to each character.
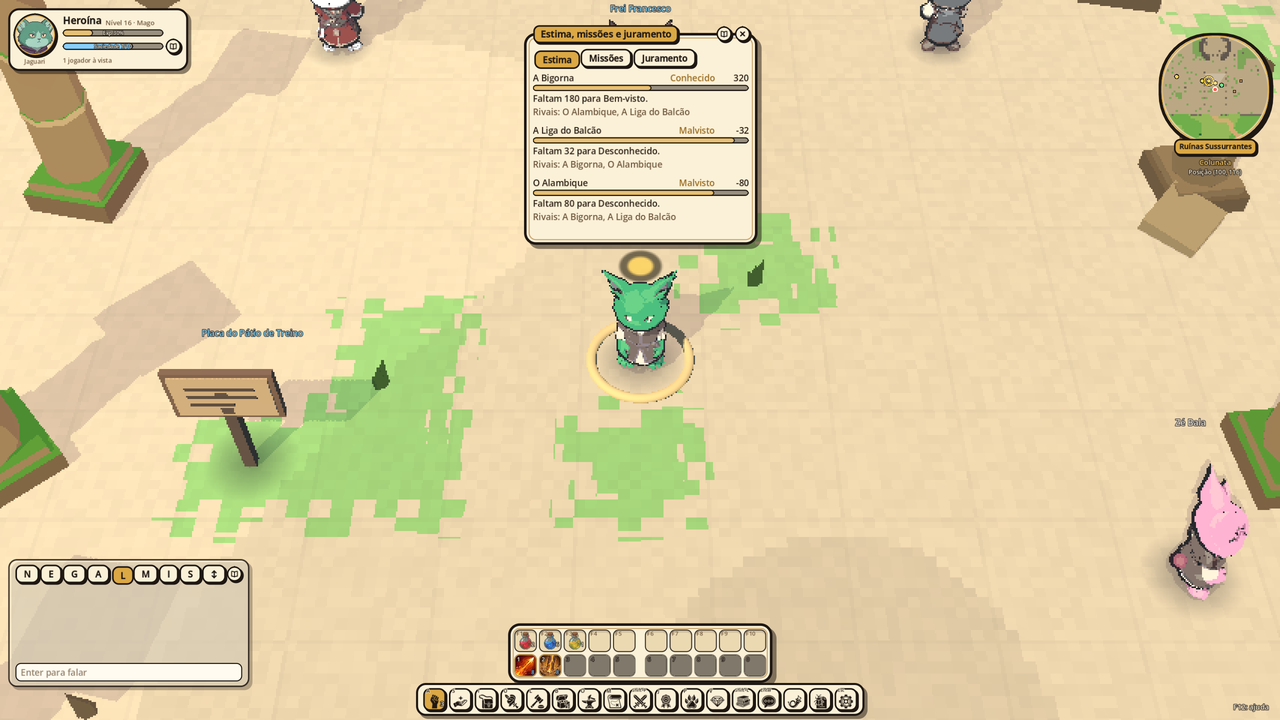
- The J key (or the Standing button on the bar) opens the window with the factions you already know: the tier (from Despised to One of the house), the number, a bar to the next tier and the rivals of each one. The ones you haven't met yet don't appear.
- You gain standing through conversations and missions with a faction's NPCs. When you gain it, its rivals cool off a little: the chat tells you, for example, "Your standing with the Anvil rose (+40). The Still heard about it (−10)."
- Losing standing with one side doesn't warm up the other, and standing doesn't decay over time.
- Killing monsters gives no standing. And it never locks the essentials: selling, changing class, learning a trade and using the auction work with any standing.
- The Oath tab shows your oath, your marks and your house (Oaths).
Faction missions
From level 5, some NPCs pass on requests from the factions, drawn for you and valid for the day: Clerk Lívio Marino, on the road east of the Ruins, brings the hill testimony (Houses Malaspina and Altieri want to prove they patrol the hill), and the dispatchers, in the Ruins Courtyard (Dispatcher Ugo Benedetti and Dispatcher Clara Morelli), bring the orders of the Anvil and the Still. Each NPC does just one thing: whoever teaches a trade doesn't give requests, and whoever gives requests doesn't receive oaths. A ! above the NPC tells you they have a request for you.
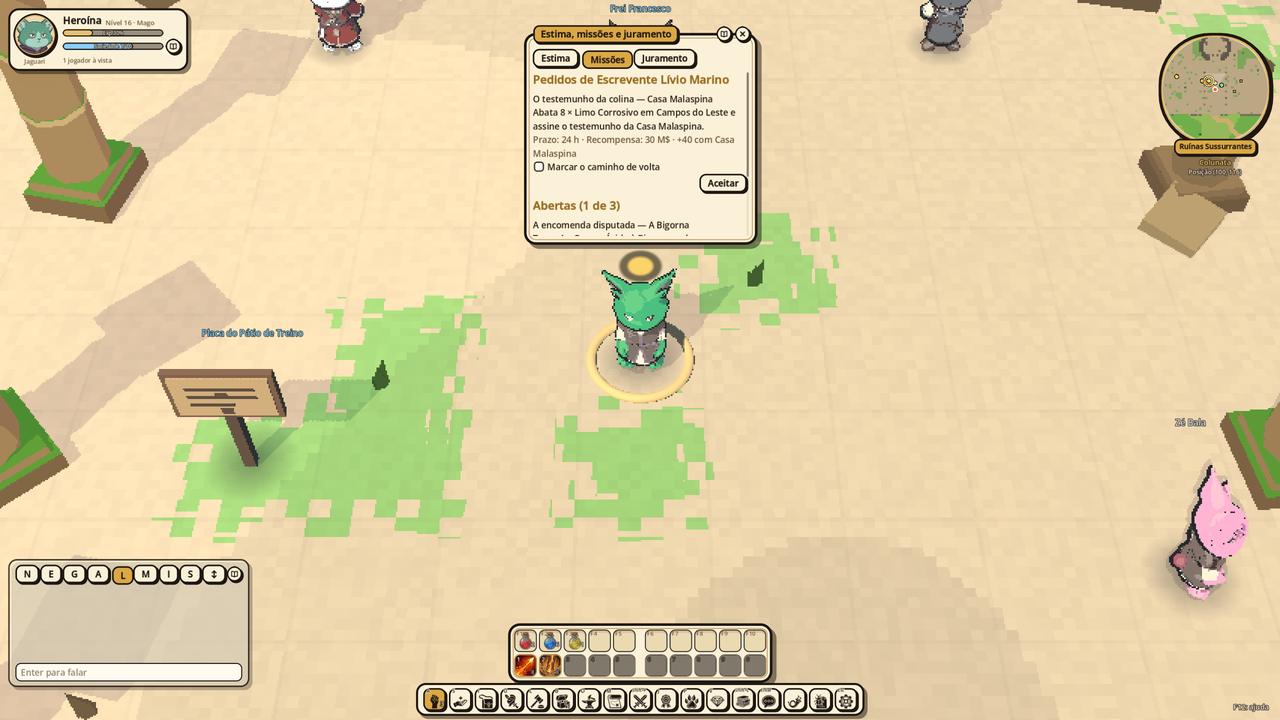
- Talk to the NPC to the end: they tell you the request, and the J window opens on the Missions tab, with what to do, the deadline and the reward. Press Accept.
- Only what comes after accepting counts: items that drop afterwards (what was already in your bag doesn't count) and kills made afterwards, in the requested area. Each kill that counts shows up in the chat, like "Testimony: 3/8".
- Right after you accept, the rival finds out and sometimes offers more for the same mission (the counteroffer). You hand in to one side only: handing in to the rival pays more, but your standing with whoever asked first drops.
- Once the mission is done, the top of the screen tells you ("Mission ready: ..."). Go back to the NPC: the Missions tab shows Hand in (to whoever asked, or to the rival). The Muggys, the standing and the delivered items change all at once.
- The way back: in the offer, the Mark the way back box (checked from the start for the Training Room missions) makes golden dots on the ground and a golden ring on the minimap lead to whoever receives the mission once it's ready (on another map, first to the right exit). On an open mission, the Way back box turns it on and off.
- You can have at most three open missions. On the tab, Give up removes one; the request only comes back the next day, like one you handed in.
- Each mission has a deadline (the tab shows how much time is left); once it expires, it disappears.
- Rebel missions: in Whisper Village, Farmer Ada Orsini, near the vegetable gardens to the west, asks you to free her husband, whom the collector's henchmen are taking down the road. Accept, go to the spot the mission summary shows (the area and the minimap coordinates) and attack the henchmen: when low on health, they flee instead of dying, and each escape counts. With no escort, the prisoner walks home on his own; talk to Ada to hand in. A rebel mission pays little in Muggys, but gives the No-Crest mark, which adds up with each rebel mission and which people talk about. If you leave the Village midway, the escort disappears and comes back when you return.
The Request Board. In the Ruins' Training Yard stands the Request Board. Read the sign to the end: the J window opens on the Missions tab with your requests for the day, up to three, each from a different faction, with the line "Deliver to" telling you whom to take it to.
- Each character sees a different board, and yours stays the same all day. At midnight (server time, UTC), the board changes.
- A request you accept leaves the board and isn't replaced by another until the next day. It is the same request the NPC offers in conversation: accepting in one place counts for both.
- You hand it in to whoever signs the request (Clerk Lívio Marino or the dispatchers), not at the board.
The trade certification. Those who have a trade also receive, at the board and from the dispatcher of the guild for their line (Dispatcher Ugo Benedetti, of the Anvil, for artisan and blacksmith; Dispatcher Clara Morelli, of the Still, for cook and alchemist; both in the Ruins Courtyard), the certification request: craft a recipe you already make, with the requested effort or more, and bring the piece with your signature. The requested effort is one step above the one you use most: the request pushes you to the next step. Only a piece made after accepting counts; the chat says "Certification: 1/1" when it comes out, and handing in takes the piece.
The pet (P key)
The pet is a real monster, hatched from an egg, that walks at your side and looks after you: when your HP or MP runs low, it uses Love for the Master, which heals a part of the maximum. Each character has one pet, theirs alone: it can't be traded or sold, and it doesn't go to the auction or to storage.
- Hatching: eggs drop from monsters. With an Incubator in your bag (the blacksmith makes it, and it doesn't wear out), use the egg outside town. Sometimes the pet is born (10%); the rest of the time, the wild monster is born, already attacking.
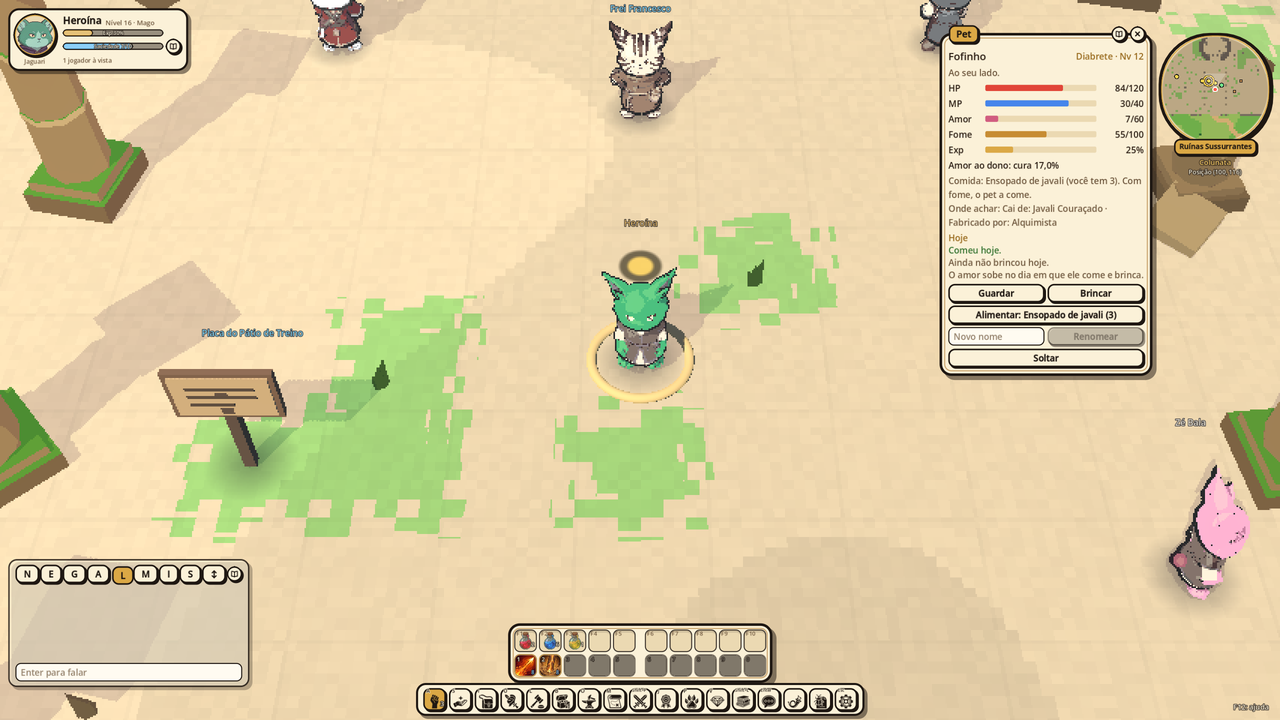
- The window: the P key (or the Pet button on the bar) shows the name, species, level, HP, MP, love for the master (from 0 to 60) and hunger. Call brings the pet to your side; Put away puts it away, and while put away it doesn't heal and, while you are playing, doesn't get hungry. Rename changes its name.
- Caring: love goes up 1 for each day on which you feed it and play with it (with the pet at your side). The more love, the more Love for the Master heals. The food is the species' own: the alchemist makes it, and monsters of the same species drop it. A starving pet doesn't heal or fight. While you are out of the game, its hunger drops too, more slowly than in the game: if you come back the next day, your pet will be hungry.
- Playing: with each Play, the pet does one of the games its species knows, and those nearby see it: it runs around you, fetches a stick and comes back with it in its mouth, jumps over you, lies belly-up for a scratch (you crouch down) or runs with you to a spot and back. Walking, attacking or casting a skill in the middle stops the game.
- Skills: some species learn skills as they level up, and the pet uses them on its own: heals and, like the Howling Monkey, buffs on you when you go into a fight (also outside
/afk). In a fight with another player, it doesn't heal or buff you. - Fighting: it fights alongside you when you are on
/afk; otherwise, it only defends itself: a monster that attacks the pet gets hit back until it falls. Aggressive monsters attack it; players don't, and clicking it doesn't attack it. - Reviving: a pet that dies loses 1 love and stays fainted until you revive it in the window, with a Tear of Vitta from your bag.
- Releasing: the pet goes away forever (the window asks for confirmation), and you can hatch another egg.
Oaths
At level 10, with your class chosen, your character can swear to an order, guard or brotherhood of Paroi. An oath gives identity, not power: a sign above your head, which everyone sees, a title under your name and NPC lines that start treating you differently. In return, a door closes: each order doesn't accept certain missions, and the NPCs won't even offer them to you ("In that uniform? Forget I said anything."). The rest of the game (chat, PvP, trading, the masters) stays the same. The oath belongs to each character, and only one at a time.
| Order | Who swears | Where | Sign and title | Locks out | On leaving |
|---|---|---|---|---|---|
| Aurélia Guard | any class | Sergeant Dario Ferri, at the Whisper Village guard post | Aurélia's sun; "Guard" | rebel missions | can swear again after 7 days |
| Crown Companies | any class | Corporal Tito Barone, at the East Gate of the Ruins | the crown; "King's Soldier" | missions from the noble houses (Malaspina and Altieri) | can never come back (deserter) |
| Hill Watch | Warrior | Watcher Teo Rocca, at the North Gate of the Ruins, on the outside | the golden tower; "Hill Watcher" | missions from the houses that dispute the hill | can never come back |
| Field Vows | Priest | Brother Dino Cattaneo, in the Ruins, next to Father Matteo | the open hand; "Field Priest" | missions from the Curia | can swear again after 7 days |
| Order of the Free Song | Mage | Wanderer Selene Marchetti, in the Whispering Grove | the musical note; "of the Free Song" | pet missions; and your pet stays put away | can swear again after 7 days |
| Instinct Wardens | Mage and Acrobat | Warden Bruno Valente, in the Whispering Grove | the necklace of teeth; "Instinct Warden" | hunts of creatures that only roam about | can swear again after 7 days |
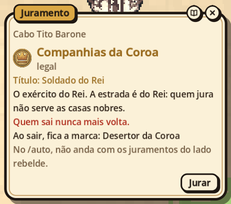
- Swearing: talk to the end with whoever receives the order. If you can swear, the oath window opens, with what the order is, what it locks out and what happens when you leave. If you can't (class, level, the wait for someone who left recently), the window tells you why. Press Swear.
- Leaving: only with whoever receives the order, in the same window, with Leave the oath (which asks for confirmation). The sign and the title disappear, and a mark remains ("Former Guard", "Crown Deserter"), which the NPCs comment on. In some orders, whoever leaves can never come back: the window warns you in red.
- The two pet orders: whoever swears to the Instinct Wardens sees their pet's love rise twice as fast for each day of care. Whoever swears to the Free Song ("nothing that sings has an owner") doesn't use a pet: the pet stays put away for as long as the oath lasts (it can't be called, and no egg hatches), and it comes back when you leave the order; in return, you regenerate 10% more HP and MP out of combat.
- Your house: the characters on your account form your house, which bears your player name. If one of them has the No-Crest mark (from rebel missions), or swore to a rebel order, the whole house falls under suspicion for a while: the nobles speak to you more coldly, and some orders that are still to come (the Royal Academy, House Altieri, the Inquisition) will refuse members of a suspect house. The Oath tab of the J window shows your oath, your marks and whether your house is under suspicion, and until when.
Marriage
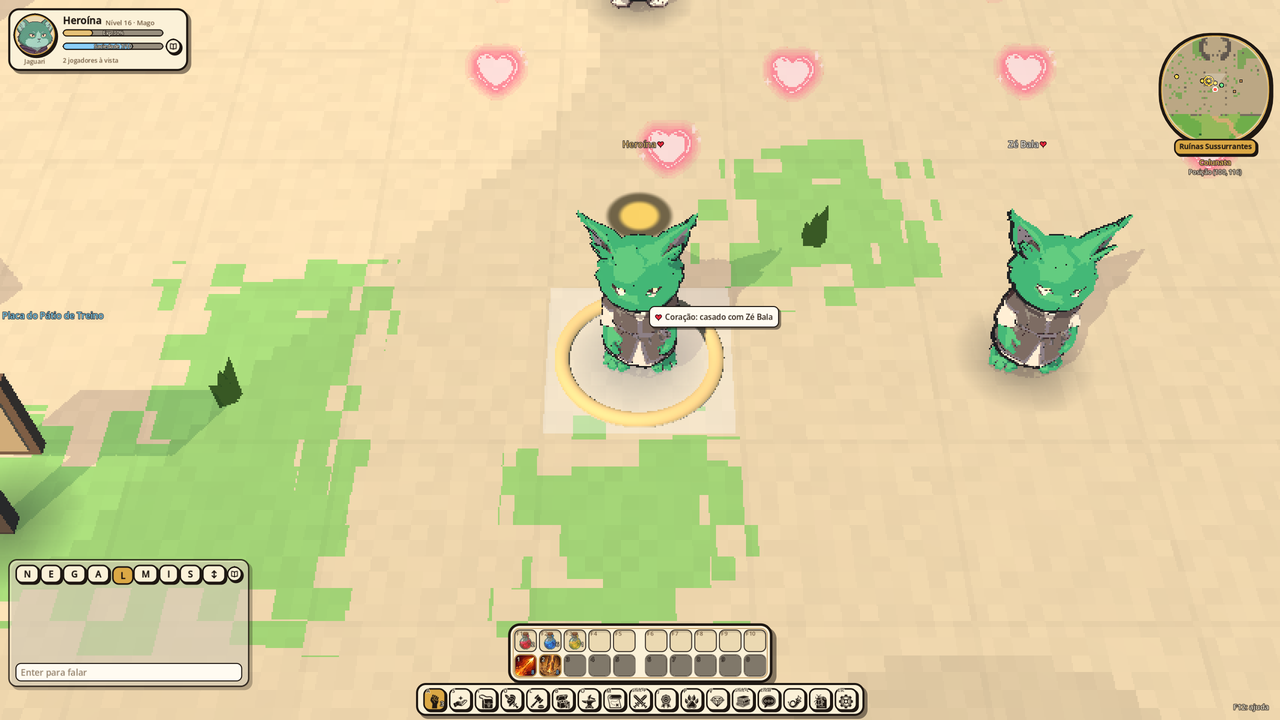
Two characters from different accounts can marry. Those who marry get a red heart next to their name, which everyone sees, and the True Love skill.
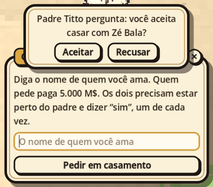
- With the priest: Father Titto, in front of the Chapel of the Four, in Musgueira, and Father Giovanni, in front of Aurélia Cathedral, marry those who love each other. Talk to one of them to the end: the marriage window opens, where you write the name of the one you love. Whoever asks pays the fee (5,000 M$).
- The "I do": both need to be near the priest (up to 5 cells). A notice at the top of the screen asks each one, one at a time: "Do you accept marrying...?". With both pressing Accept, the hearts rise and you are married. One Decline, or 60 seconds without an answer, ends it all, at no cost.
- With a player Priest: a level 20 Priest with the Curia's authorization can also marry people. The authorization is a mission: Father Giovanni charges the fee and gives the Blessing of the Curia, which Father Titto, in Musgueira, exchanges for the Officiant mark. Then, near the couple, the priest types
/casar "Someone" "Someone Else"; the first one named pays the Curia's share (1,000 M$), and the priest charges whatever they want, on the side. Those who swore the Field Vows don't get the authorization. - Who can't marry: two characters from the same account; someone who is already married; someone sworn to the law (legal) with a rebel; and anyone in the Order of the Free Song (who, in return, regenerates 1 MP more). Once married, the NPC refuses an oath that would break this rule.
- True Love: it appears in the skills window (S) of everyone who is married, with no points, and goes onto the bar like the others. Click your spouse: they regenerate 10% of their max HP and MP, and you pay 15% of yours (with 15% HP or less, you can't cast it). The cooldown is 10 seconds.
- Divorce: only with Father Giovanni, at the Cathedral, for 50,000 M$, paid by whoever asks; one spouse is enough. Each one's next marriage costs double, and the doubling builds up with each divorce (2×, 4×, 8×...). If your spouse is deleted, you are widowed and can marry again at the normal price.
Associations
The association is Paroi's clan: a group of players who want to play together for a long time, with a name, an emblem, a chat channel, a notice board, a shared storage and bank, and a level that gives extra experience. It belongs to the account: when your account joins, all your characters join together. It holds 30 accounts.
The side. Every association has a side, chosen when it is founded and which never changes: legal, neutral or illegal. A character's side is that of their oath (the orders of the law are legal; the rebel ones, illegal); someone who hasn't sworn is neutral. Only a character on the same side as the association enjoys what it offers and shows its name and emblem under their own name. A character on your account from another side stays in the association, but without any of this, and the window tells you why.
Founding. Any character of level 10 can found one, with whoever registers associations:
| Side | Where | What it costs |
|---|---|---|
| Legal | Notary Lucrezia Pagano, in Aurélia's Cathedral Square | the King's fee (10,000 M$) and the Church's tithe (2,000 M$), plus 10 legal renown |
| Neutral | the same notary | the fee and the tithe, and the Book of the Middle Path, which drops from any regular monster from level 10 on (it's rare); double-clicking the book, in your bag, shows the route to the notary |
| Illegal | Fixer Nello Sposito, in Aurélia's Riverside, only at night | the bribe to a priest and to a bureaucrat (6,000 M$ each), plus 10 rebel renown |
A side's renown goes up with the missions of the factions on that side (the rebel ones, for illegal; those of the Crown, the Curia, the Inquisition and the noble houses, for legal; the others, for neutral). When founding, you choose the name (unique in the game) and the emblem: one of the side's 100 shapes, in one color on a background, which no other association can have the same. The GMs sometimes run promotions that lower the cost.
The ranks. Whoever founds it is the leader. The leader promotes and demotes (the board and the members), hands over the leadership and removes anyone but themselves. The board invites, removes members and writes on the notice board. To invite, right-click a player and choose Invite to the association, or write their name in the window; they answer a question on screen. If the leader lets all the characters on their account hibernate from hunger, whoever has been on the board the longest takes over the leadership.
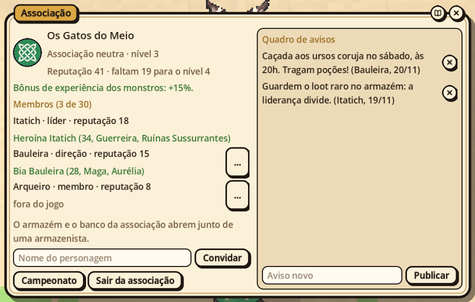
The window (Shift+G) shows the association: on the left, the level, the bonus, the members with their rank, reputation and who is in the game (with each one's map), the invitation and Leave the association; on the right, in its own area, the notice board.
- The channel:
/a text, or the chat's Association button; the A tab shows only that channel. - The notice board: the leader and the board post; the 5 newest stay up, of up to 200 letters each, and the newest one appears in your chat when you log in.
- On the world map (Shift+M): under each place, "Someone is here", with the members who are there.
- Reputation and the bonus: each faction mission of the association's side gives your account reputation inside it, and the sum of everyone's reputation raises the level, from 1 to 20. Each level gives 5% more experience from monsters (up to +100% at level 20), to those with at least 5 reputation. The bonus adds up with the party's and is multiplied by GM events. When an account leaves, its reputation leaves with it, and the level may drop.
The association's storage and bank. With a storekeeper (Livia Conti, in the Ruins; Lucia Conti, in Whisper Village; Pietro Lanza, in Aurélia), the storage window gets the Association storage tab:
- Store: before storing, choose under Who can take what you store who can take the item out: All members, The board and the leader or Only the leader. Storing costs the same as in the account storage. It holds 110 stacks at association level 1, and 10 more for each level.
- Withdraw: each stack says whose it is and who it is for ("From Someone · The board and the leader"). Withdraw only lights up for those who can; what you stored, you can always take back. The leader changes who each stack is for with the For: … button.
- The bank: any member can store coins; only the leader withdraws, unless they check Board can take. At the bottom, the latest movements tell who stored and who took what.
- If your account leaves, what it stored stays with the association. If the association dissolves (everyone leaves), each item goes back to the account storage of whoever stored it, and the bank's coins go to the account storage of the last leader.
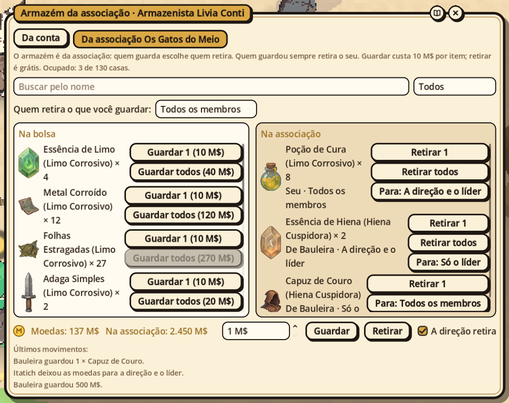
The association championship
Once per Paroi month, the GM opens the association championship: teams from different associations fight in an arena, by level tiers, in single elimination (lose and you're out). The announcement comes out in the global chat, and the championship window opens with Shift+C or the association window's Championship button: the current edition and the bracket of each tier, with the teams and the matches of each round.
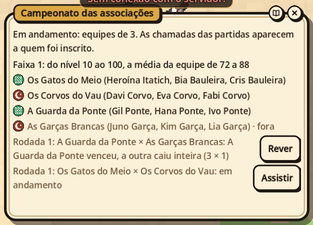
- Registration: the leader or the board chooses the tier and checks the association's characters, as many as the team size the GM chose (from 2 to 10). The characters who can enter are those on the association's side, from accounts with the minimum reputation in it, one character per account in each edition; each one between the tier's minimum and maximum level, and the team's average close to the tier's average (in tier 1, from level 10 to 100, an average of 72 to 88). The association bank pays the registration (1,000 M$ per character), and Give up refunds it while registration is open.
- The call: at match time, each registered player gets the question "go to the arena?", with the time left on the call. Whoever accepts goes to their team's side in the Association Arena; the team fights with whoever came, and with nobody it loses by forfeit. Whoever logs in during the call gets the question.
- The match: a short countdown and the fight, of up to 10 minutes. In the arena, your team is your party: you heal and buff each other, and only opponents can hit each other. The scoreboard, at the top of the screen, shows those standing, those fallen and the kills of each team, and the time.
- Whoever falls loses nothing, but stays down until the end: they don't reincarnate, and neither Resurrection nor the Tear of Vitta work in the arena. Whoever leaves the arena (or loses their connection) after the start counts as knocked out.
- Who wins: the team that knocks out the whole other team; when time runs out, the one that knocked out more and, on a tie, the one that dealt more damage. Ten seconds after the result, everyone goes back to where they came from, standing and with full health.
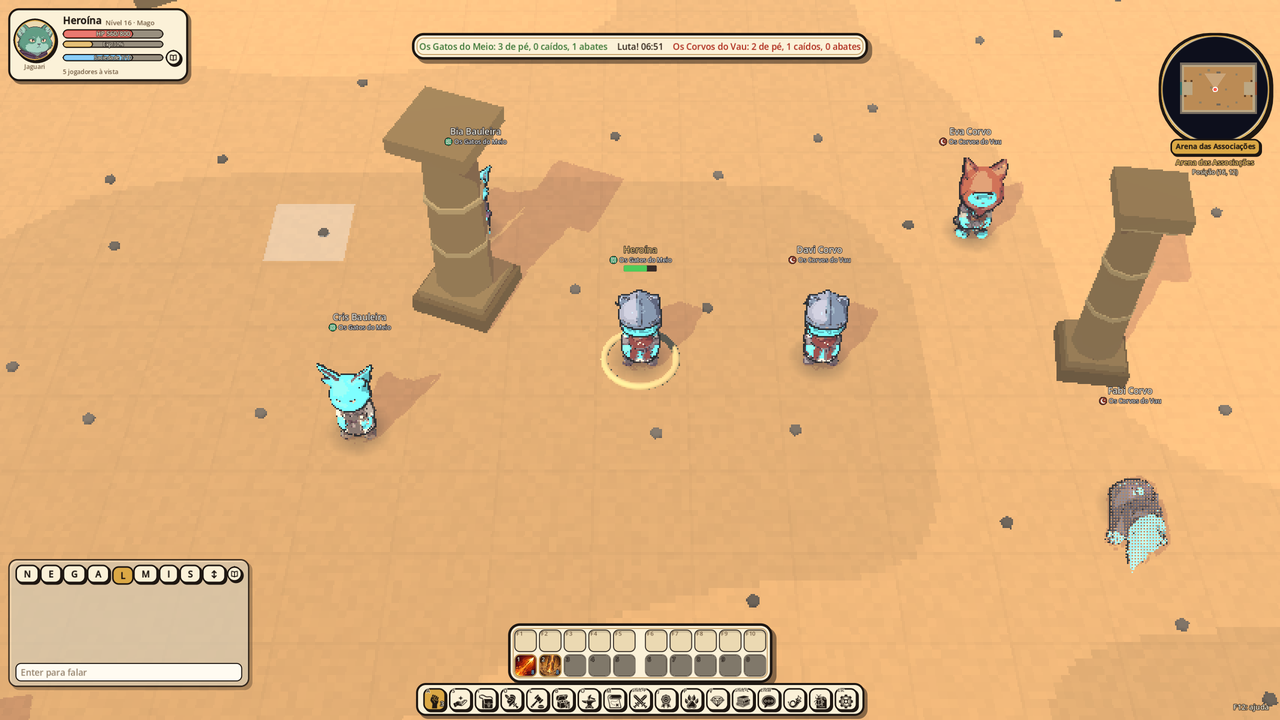
- The prizes: three quarters of what the tier's teams paid come back in Muggys, two thirds to the champion and one third to the runner-up, split among the characters, in the account storage (B key); each one also gets reputation in the association, and the champion gets the golden emblem (the name under the name in gold) for a month.
- Watching and replaying: anyone can watch a match in progress with Watch in the championship window (except those fighting in it): the character goes to the arena invisible, nobody sees or hits them, and they see the whole arena; drag the ground with the left button, or use the arrow keys, to move the camera. At the end of the match, or with Leave, they go back to where they were. Finished matches are recorded (finals forever, the others for 30 days), and Replay shows them again, in an empty arena, with pause and speed (½, 1, 2 and 4 times).
Your house: lot concessions
In Aurélia and in Musgueira, the towns' lots are bought at the Land Registry: from Scribe Ottavio Bassi, in Aurélia, and from Surveyor Paolo Ferraro, in Musgueira. Nobody owns the land: the King grants a concession, which belongs to the account. All the characters on the account live on the lot, and only they (and the spouse) can enter. Each account has only one lot, in the whole game.
At the end of the conversation with the Registry, its window opens. At the top, your concession: the lot, until when the tithe and the tax are paid, the overdue weeks and the notice, if any, and Pay with how many weeks to pay. Below, the town's lots, with the type, the price and what a week costs; the filter chooses the type, and Only those for sale hides the occupied ones. Buy asks first, because the purchase can't be refunded.
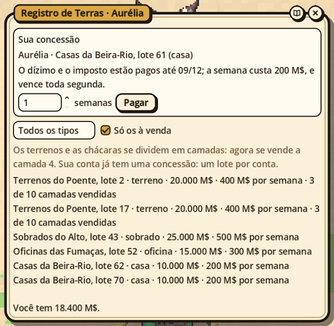
| Type | Price | Tithe and tax per week | Divided |
|---|---|---|---|
| House | 10,000 M$ | 200 M$ | no |
| Workshop | 15,000 M$ | 300 M$ | no |
| Plot | 20,000 M$ | 400 M$ | into 10 layers |
| Townhouse | 25,000 M$ | 500 M$ | no |
| Farm | 50,000 M$ | 1,000 M$ | into 10 layers |
- Houses and townhouses are a roof: inside,
/srmakes the house your return point, and if you leave the game inside it you come back there./srworks on any of the account's lots. - Workshops are a roof too, and they craft: they have the workbenches (see Production on the lots). They aren't divided.
- Plots and farms produce (planting, raising animals, digging). Each one is divided into 10 layers, and sales fill one layer at a time: first all the first layers, then the second ones. The Registry assigns the layer; you only choose the lot.
- The door of the lot leads inside; for those who don't live there, it is locked. On the minimap, a little orange house marks the door of your house (and that of the association's residence), and on the world map (Shift+M) its town says "Your house".
- The tithe and the tax fall due every Monday (at midnight GMT). The purchase already pays for the week in which it happens, and you can pay up to 8 weeks in advance. A spouse can pay for the other.
- Use: every Paroi month (28 days), the lot must be used: entering once, for the house and the townhouse; 4 harvests (any harvest, milking, slaughter, honey or digging), for the plot and the farm; 4 crafts at a workbench, for the workshop. In the concession's first month, nothing is required.
- The notice: whoever leaves a week unpaid, or goes a Paroi month without using the lot, gets a notice in the chat, on logging in and every day. After 2 weeks under notice, the concession goes back to the Registry: what was inside goes to the account storage, and what was paid isn't refunded.
The association's residence. The association can have its own house, townhouse or workshop, outside the one-lot-per-account limit. The leader buys it at the Registry, with the association bank, through each lot's For the association button. The weeks are paid out of any member's pocket or, for the leader and the board, also from the bank. Members on the association's side can enter.
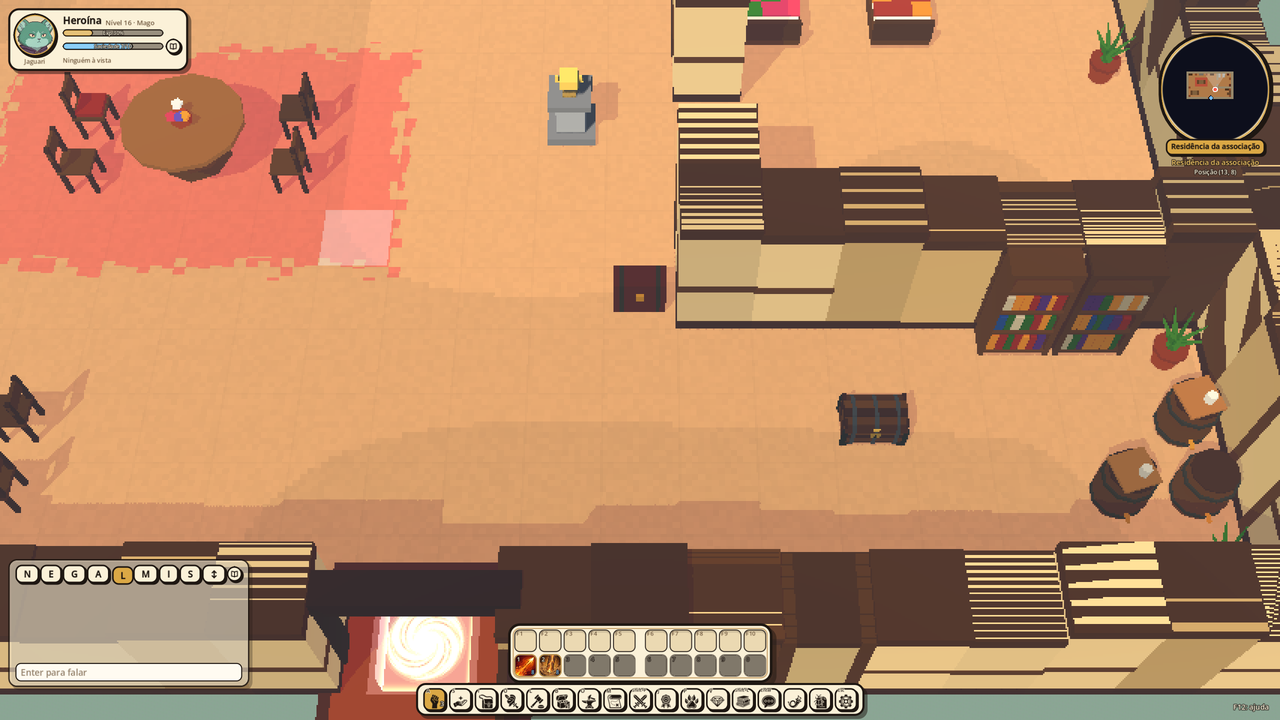
Inside, the chest opens the association's storage and bank (only its tab), and the pedestal tells the trophies from the last championship. On the street, next to the door, the sign with the association's emblem and name opens the association window for members and tells others whose house it is.
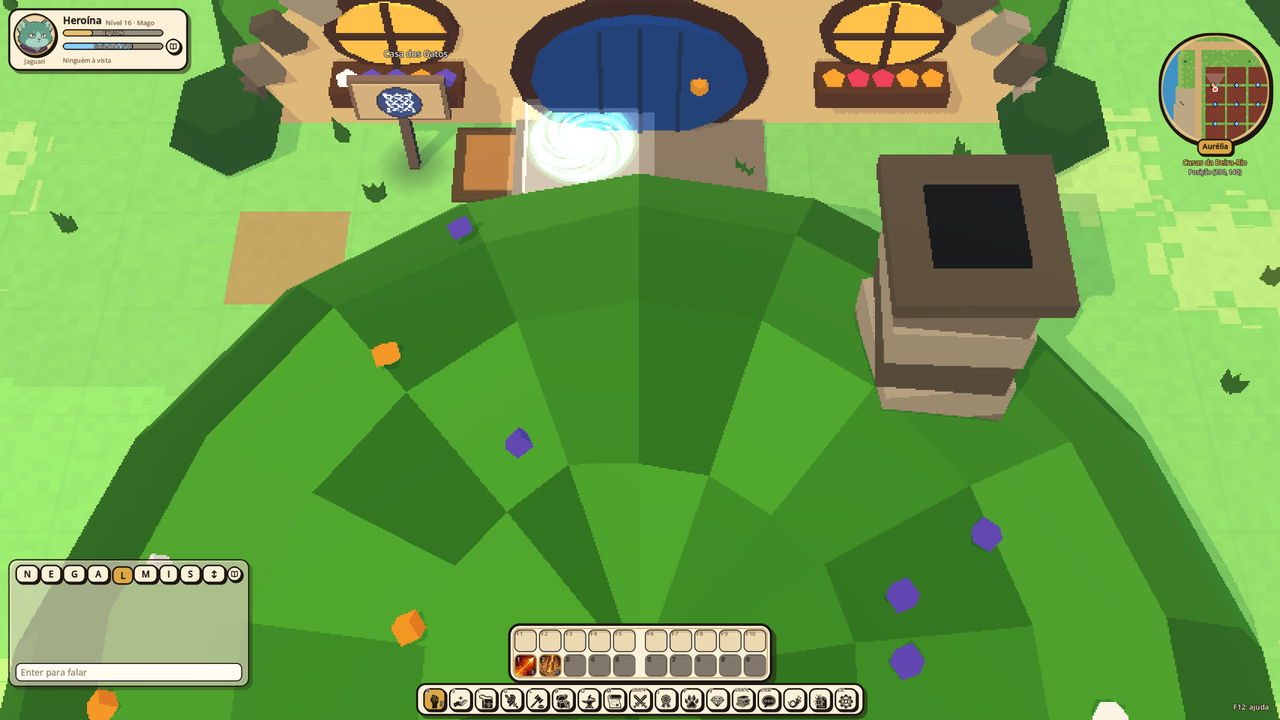
Production on the lots
The plot, the farm and the workshop produce, and what they produce is sold to other players at the Aurélia Open Market. The idea: the farm raises animals and plants, the plot plants and digs, the workshop crafts, and each one needs the others.
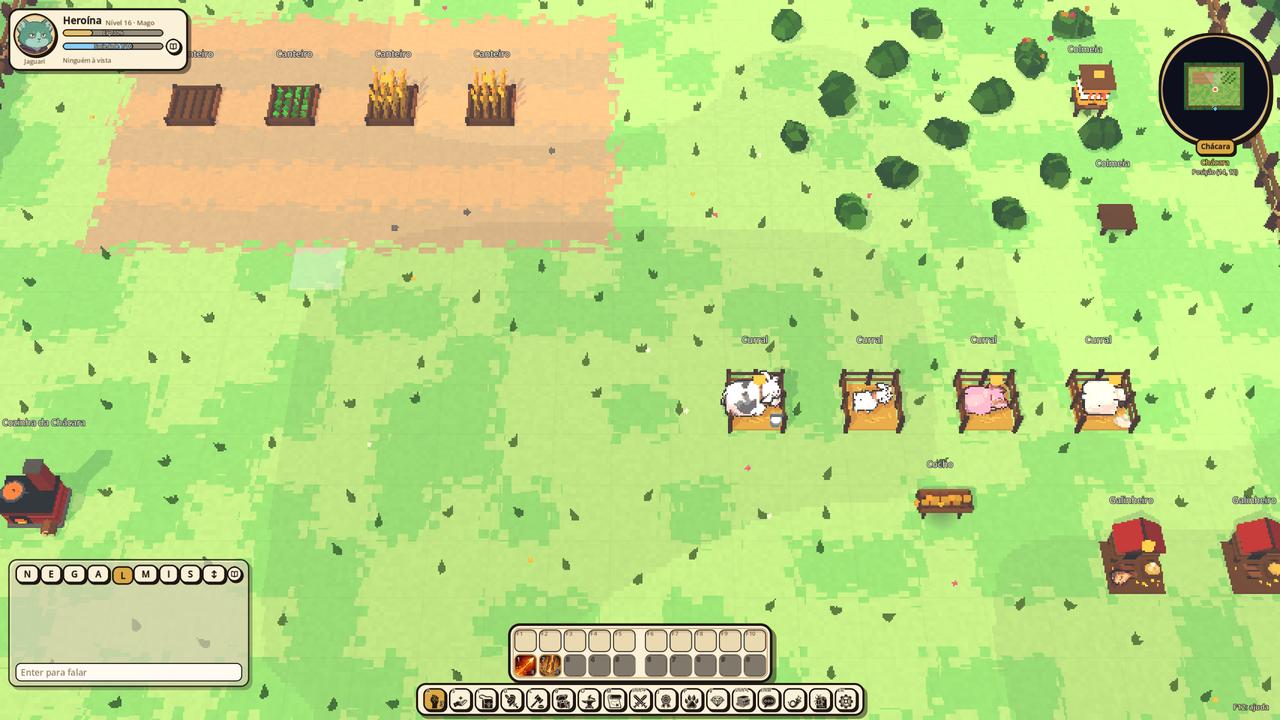
The sources (inside the plot and the farm). Click the garden bed, the pen spot, the beehive or the pit (from up close): the source window tells you what is there, how much is left and what you can do, with one button per action.
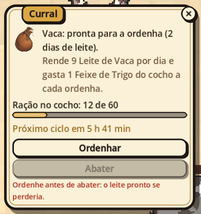
| Source | Where | Starts with | Yields | When |
|---|---|---|---|---|
| Garden Bed | farm (4) and plot (2) | 1 Wheat Seeds | 12 Wheat Sheaves | 24 h after sowing; once harvested, it is empty |
| Pen (one spot per animal) | farm (4) | a Goat | 3 Goat Milk a day | every day, with 1 sheaf in the trough |
| a Cow | 9 Cow Milk a day | every day, with 1 sheaf in the trough | ||
| a Pig | 10 Pork and 2 Leather, when slaughtered | after 3 days, with 3 sheaves in the trough | ||
| a Sheep | 4 Wool a day | every day, with 1 sheaf in the trough | ||
| Henhouse (one spot per hen) | farm (2) | a Hen | 6 Hen's Eggs a day | every day, with 1 sheaf in the trough |
| Beehive | farm (2) and plot (1) | a Beehive | 5 Honeycombs a day; every 7 harvests, 1 Queen's Jelly | every day |
| Pit | plot (1) | nothing (it comes ready) | 6 Sand and 6 Clay a day | every day |
- The day is a real one (24 hours on the clock, whether you are in the game or not). What isn't harvested waits up to 3 days; after that, the source's clock stops until someone harvests.
- The trough on the farm holds the feed: click it to put in the Wheat Sheaves from your bag (it holds 60). Each day of milk uses 1 sheaf; without feed, there is no milk, but the animal doesn't die or get sick, and the days wait.
- Slaughtering takes the animal off its spot and gives the meat and the leather: the goat, 4 Goat Meat and 1 Leather; the cow, 12 Beef and 3 Leather; the sheep, 5 Mutton and 1 Leather; the hen, 2 Chicken Meat.
- What is harvested goes to the bag of whoever clicked (any character on the account, or the spouse). With a full bag, the harvest doesn't come out.
- Seeds, animals, beehives and feed are bought from Stallkeeper Beppe Castellani, at the Open Market.
The workbenches. The workshop has the Glass Furnace, the Potter's Wheel, the Workshop Anvil and the Leather Table; the farm has the Farm Kitchen. Clicking a workbench opens the trade window (the same as the O key). Some recipes can only be made inside a lot that has the workbench, and the window shows which one:
| Workbench | Trade | Makes | From |
|---|---|---|---|
| Glass Furnace | alchemist | Glass Flask, Test Tube | sand |
| Potter's Wheel | cook | Bowl, Pot | clay |
| Workshop Anvil | artisan | Knife, Hammer | iron bars |
| blacksmith | Iron Tongs, Grill, Anvil | iron bars | |
| Leather Table | artisan | Leather Gloves, Leather Apron, Wool Cloth, Shepherd's Mantle | leather and wool |
| Farm Kitchen | cook | Musgueira Cheese, Ford Cream Cheese, Moor Butter, Aurélia Cream, Wayfarer's Bar, Milk Bread, Baron's Frittata, Market Skewer, Pedravale Sausage, Ventania Smoked Beef | milk, wheat, honey, eggs and meat |
The tools. The Knife, the Hammer, the Pot, the Grill, the Iron Tongs, the Anvil, the Apron and the Leather Gloves stay in your bag. A recipe that calls for a tool uses up one use of it with each craft (whether it succeeds or not); after 50 uses, the tool breaks. The item's tooltip shows how many are left. The merchants sell the Knife, the Hammer, the Pot and the Novice's Anvil, expensive and with 10 uses, for those who don't yet have anyone to buy from.
The usual recipes need them too. Potions and balms use up 1 Glass Flask; oils, 1 Test Tube; the Boar Stew uses up 1 Bowl and needs the Pot; recipes that use Wild Herb (the HP Potion, the Cure Potion, the treats, the Hyena Skewer...) need the Knife; all of the blacksmith's forging needs the Hammer and the Anvil; and refining above +5 needs the Iron Tongs, the Apron and the Leather Gloves (in a service for another player, the blacksmith's own). The flask, the tube and the bowl only come from workshops: buy them at the Open Market. The trade window shows, for each recipe, the tool and what is missing.
The Open Market. Talk to Stallkeeper Beppe Castellani, in the Open Market square, in Aurélia, next to the Covered Market. He sells, at a fixed price, the seeds, the animals, the beehives and the feed. And he keeps the stall:
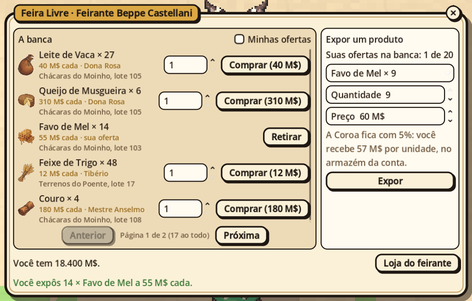
- Buy: the stall shows the offers from all the lots, with the item, how many there are, the price per unit, the seller and the lot. Choose how many and buy; the items go to your bag.
- Put on display: whoever has a lot chooses a stack of a lot product from their bag, how many and the price per unit. The Crown keeps 5% of each sale, and the rest goes to the account storage, even while you are out of the game; if you are in the game, a notice in the chat tells you about the sale. Each account can have up to 20 open offers.
- Withdraw: what didn't sell goes back to your bag, whenever you want.
- The merchant doesn't buy the new lot products (cow milk, the meats, leather, sand, the cheeses, the tools...): they are sold to other players. Wheat sheaves, goat milk and honeycombs, which also drop from monsters, the merchant still buys.
12. Tips
- Read the "!": NPCs with a mission or something new for you have the "!" above them.
- Hover the mouse over a character or a monster: after half a second, a tooltip tells you what each of its signs means: the icons above the head (buffs, in gold, with the class emblem of whoever gave them; debuffs, in red; the oath, in brass, with the title), the three dots of someone who is away, the heart of someone who is married and the GM's green name.
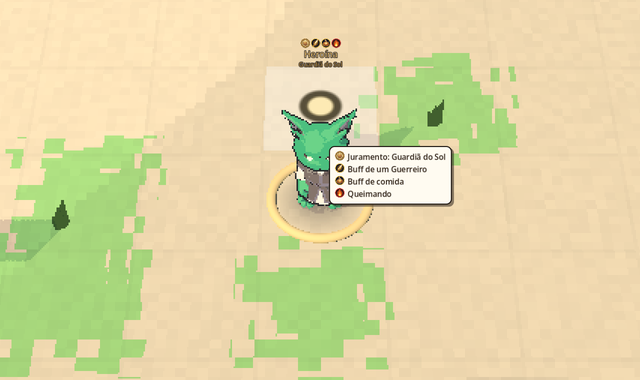
- Fight monsters of your level: high-level ones give more experience, but a mistake costs dearly after level 10.
- Play in a party: a priest and a warrior together level up much faster than alone.
- Keep rare items in storage, or list them at the auction, instead of selling them to the merchant.
Reporting a bug or an idea
Found a bug, or have an idea? Click Report, on the bottom bar, next to Sound, or type /relatar in the chat.
- The game takes a screenshot right away, before the window opens, and adds on its own where you were, your character and the game version.
- Choose Bug (something went wrong) or Suggestion (an idea), give it a short title and tell what happened and what you were doing before.
- If it's a bug, check Attach the game log: the last lines of the log help find it.
- Click Send. The game answers with the number: "Report #42 sent. Thank you!". Mention the number if you talk about the same problem later.
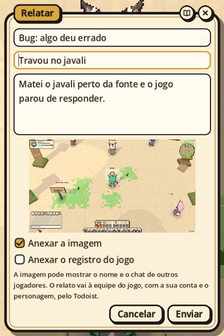
The screenshot may show other players' names and chat; if you don't want to send it, uncheck Attach the image. The report goes to the game team, with your account and character (never your password, email or IP), through an outside task service, Todoist. Each account can send up to 5 reports per hour.
The game won't even open? If it closes right away, stays on a black screen or doesn't connect, report it on the website, at paroimmo.com/relatar, with your game username and password. Attach the game log, the godot.log file (the page tells you where it is on your computer) and, if you have one, a picture of the screen. The report reaches the team the same way as the ones from inside the game.
13. GMs
GMs (game masters) look after Paroi: they help those who got stuck, investigate fraud, run events (double experience, drops, discounts at NPCs and /auto) and announce maintenance.
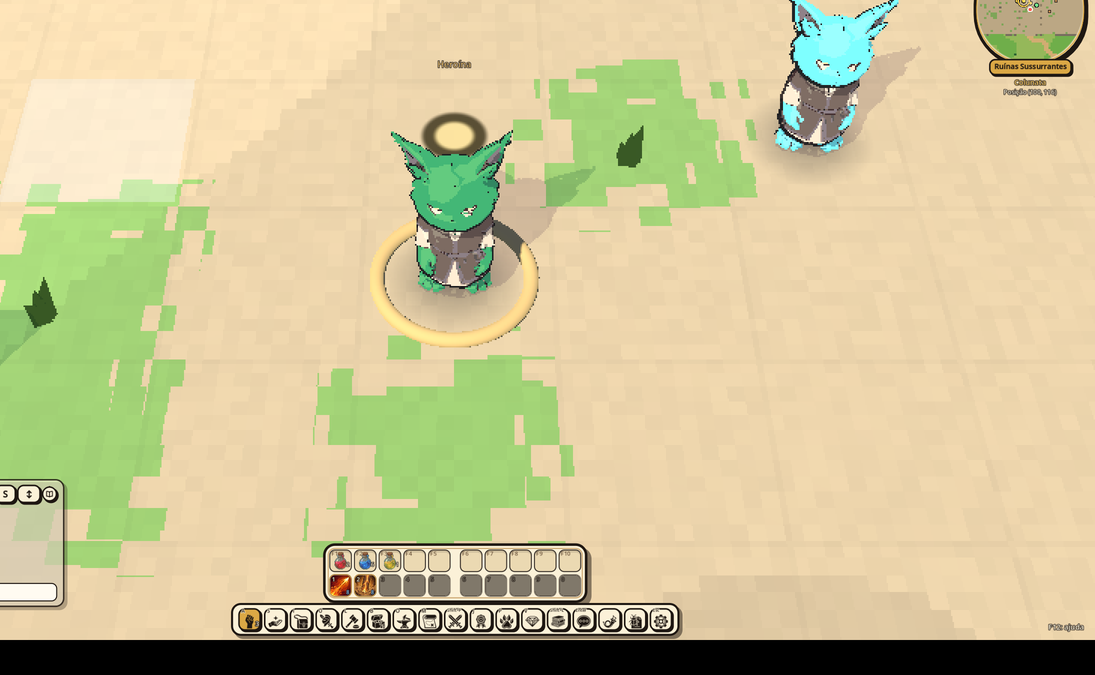
- How to recognize a GM: every GM's name appears in green, with [GM] in front, above their head (and the [GM] also in the chat), and their body has a discreet golden aura, a thread of light on the edge of the silhouette, which only GMs have. No player can create a character with "GM" at the start or the end of the name. Their chat messages appear highlighted, and only GMs talk in the global channel (the announcements at the top of the screen).
- Beware of anyone pretending to be a GM: whoever says they are a GM without the green name with [GM] is not a GM. A GM never asks for your password, your items or your coins. If someone does, use
/bloquear Nameand tell a real GM.
14. The places of Valdora
Paroi has two nations, Valdora and Vésper, which trade with each other and look down on each other a little, but never go to war. Every character starts in Valdora, in the Whispering Vale. The images in this chapter are illustrations: the game shows the same places in 3D, seen from above.
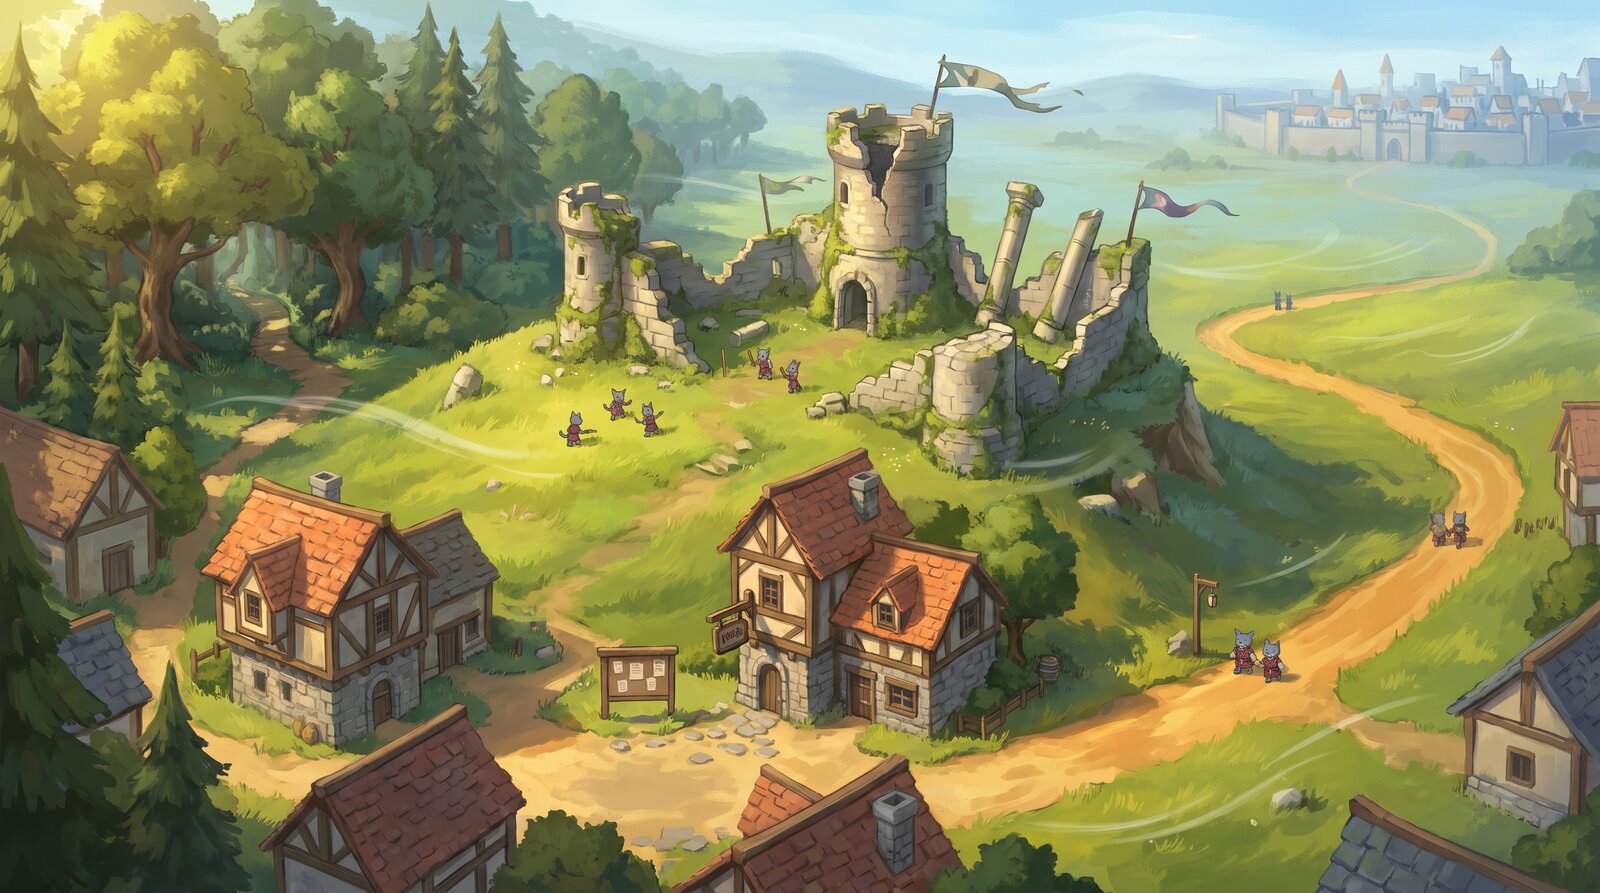
The Whispering Vale is where the story begins. On top of the hill stand the Whispering Ruins, the fallen fort of the Baron of Gatti. People say the wind in the stones is the baron's guards, still on watch.
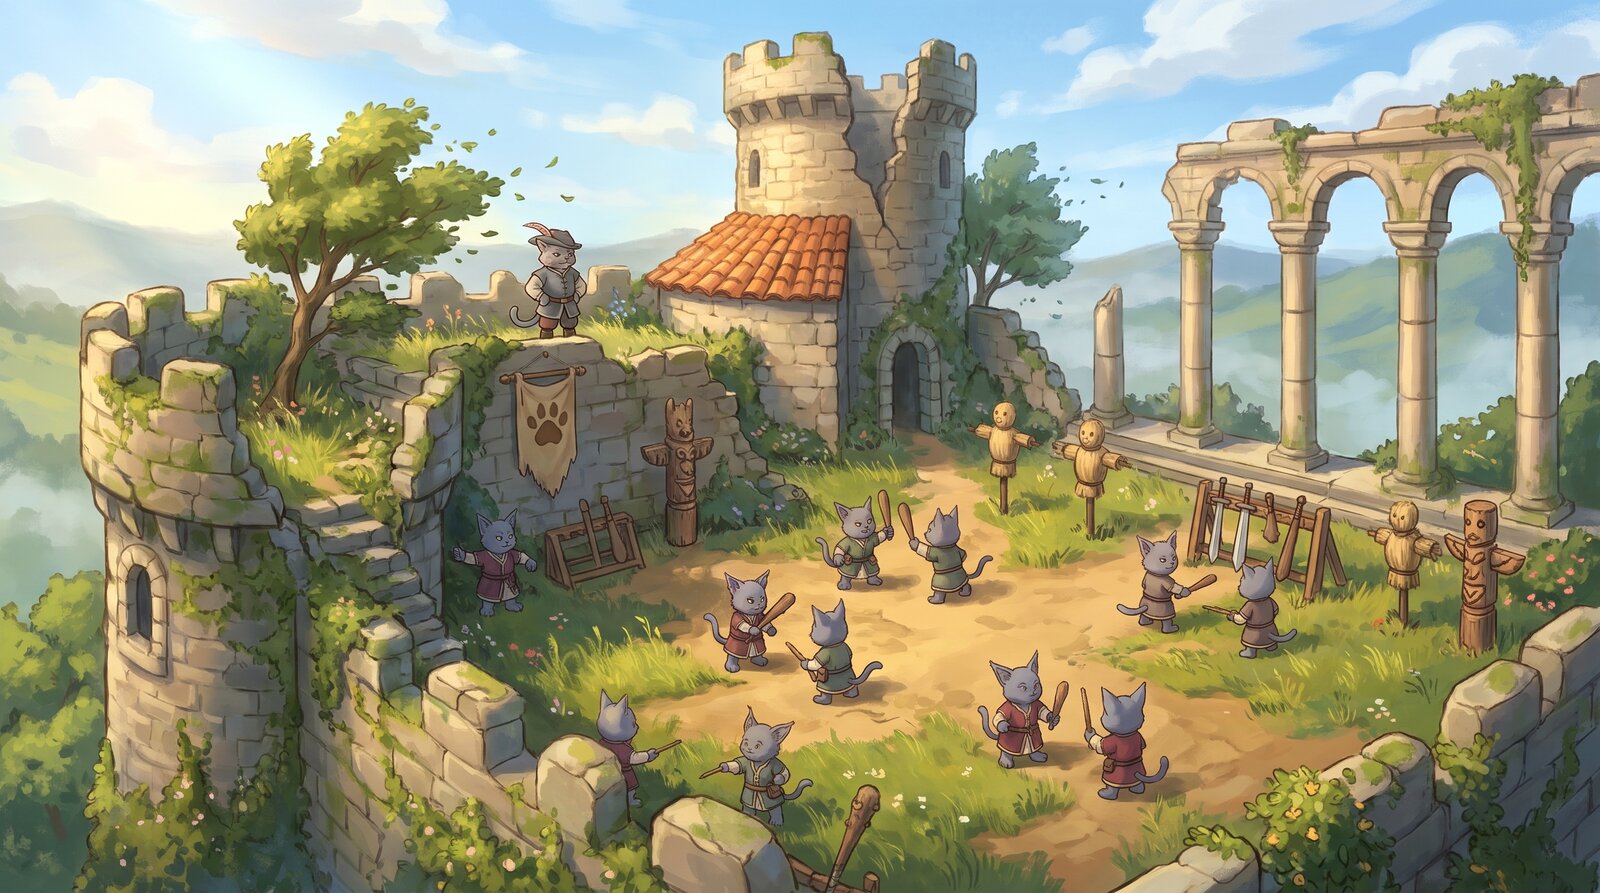
- Training Room (level 1): where you are born, with Captain Stefano Bianco, Orderly Nico (the rooms), the totems and a few slimes; the rooms are numbered, with up to 20 players each.
- Whispering Ruins (levels 1 to 10): the training ground around the baron's fort. It's where you learn to fight, wake up when you fall (with Friar Francesco) and choose your class with the Master.
- Whisper Village: the settlement at the foot of the hill and the first town. It has the inn, where you pay for your room and keep your return point, the Guard post and the Request Board. On the streets and the dirt trails, monsters don't attack. The houses are burrows, half buried in the hillside, with a round door: step on the doormat in front of the door to go in (inside there is a fireplace, shelves, a bed and a set table) and on the one by the inside door to come out in front of the same burrow.
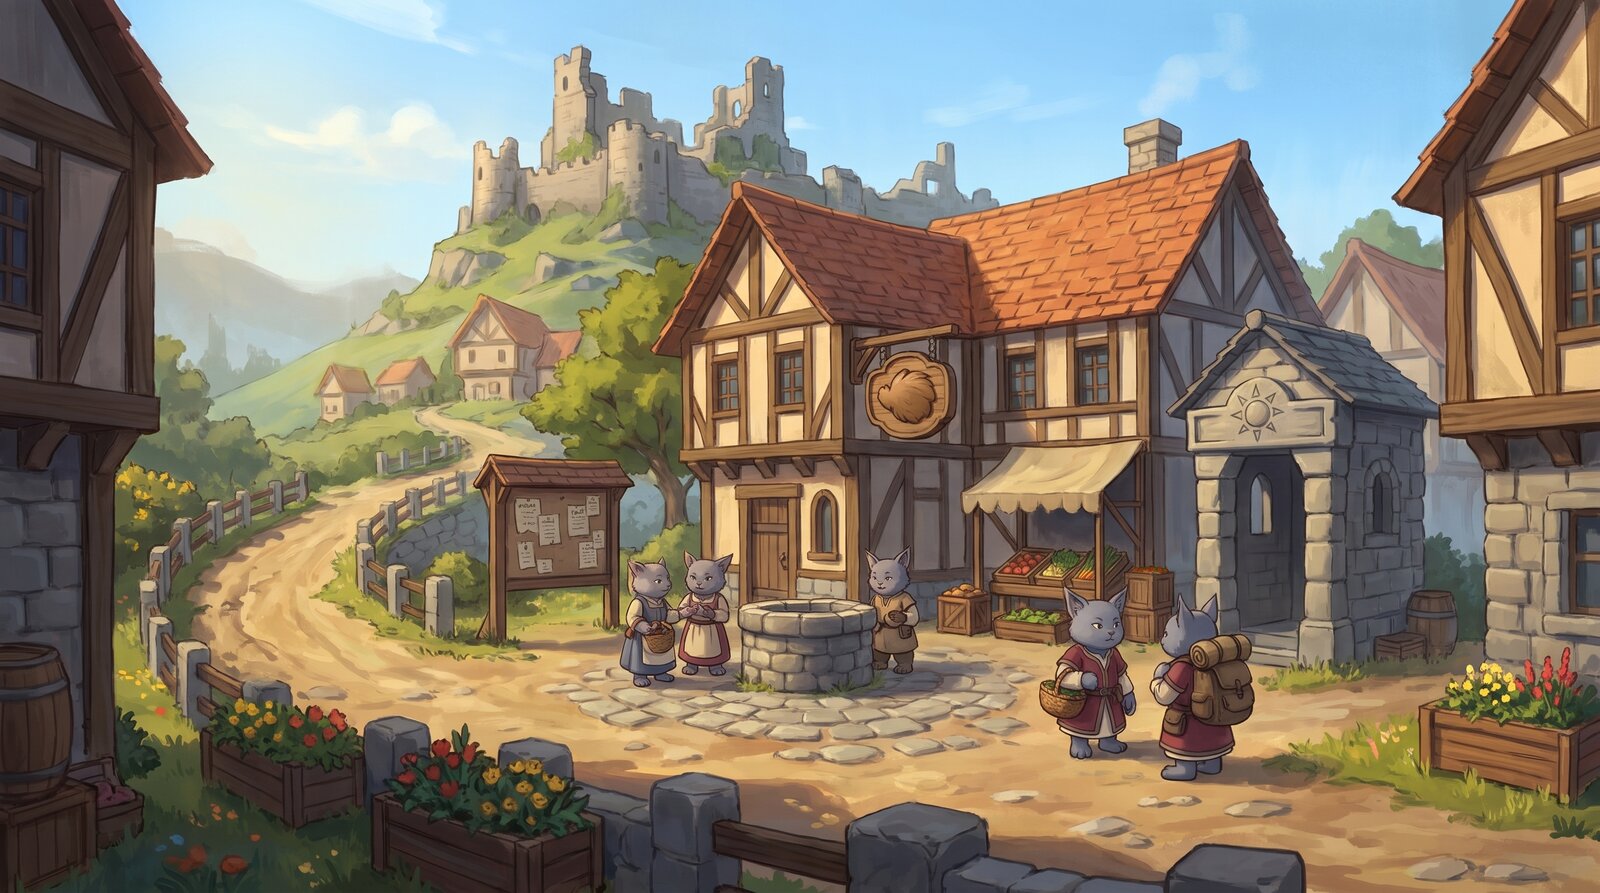
The Fort Crypt, the first dungeon
Under the Ruins, in the walled hall in the northwest of the fort, a staircase leads down to the Fort Crypt (levels 50 to 80; recommended: 3 to 5 players). The sign next to the stairs tells you the rules.
- The crypt belongs to your party. Whoever goes down first opens the party's copy, and the other members go down into the same one. Nobody outside the party ever gets in. It closes in 1 hour, with notices in the chat at 5 minutes and at 1 minute before the end. Whoever dies inside wakes up at the cellar entrance; if the whole party falls, everyone goes back to the Ruins.
- Two floors. The Cellars, with imps and crimson slimes and, in the Guard Room, the Imp Chief; and the Tombs, guarded by the Restless Guard, the empty armor of the fort's soldiers: the Soldier, with sword and shield, and the Crossbowman, who shoots from afar. In the Deep Chamber waits the Restless Castellan, the old commander. The bosses call reinforcements when their health drops to three quarters, to half and to a quarter.
- Traps stay hidden in the floor until someone steps on them or until the Acrobat's Find trap reveals them (up to 8 cells from the Acrobat, and the whole party sees them). Spikes hurt all at once, the Net holds you for a few seconds (you can't walk, but you can attack and cast), Poison hurts little by little, and the Alarm calls the monsters around. A trap that has gone off doesn't go off again.
- To disarm them, any class will do, but each trap has a challenge:
- the room's lever, hidden until someone walks nearby, disarms the spikes and the net: click it, from right next to it;
- the guardian, the monster that watches over the alarm: defeat it, and the alarm is disarmed;
- the right lock: near the poison there are three valves, and only one disarms it (each copy draws its own). The wrong one releases the poison on whoever turned it.
- The chest. When the Castellan falls, a chest appears in his room. Anyone in the party can open it, and each character takes their own prize, up to 4 times a day, with 4 hours between one prize and the next (the day turns at midnight Greenwich time, 21:00 in Brasília). Outside of that, the chest opens empty for you, with a notice of how long is left. Entry is free: you can come back to train or to help a friend.
Aurélia, the capital
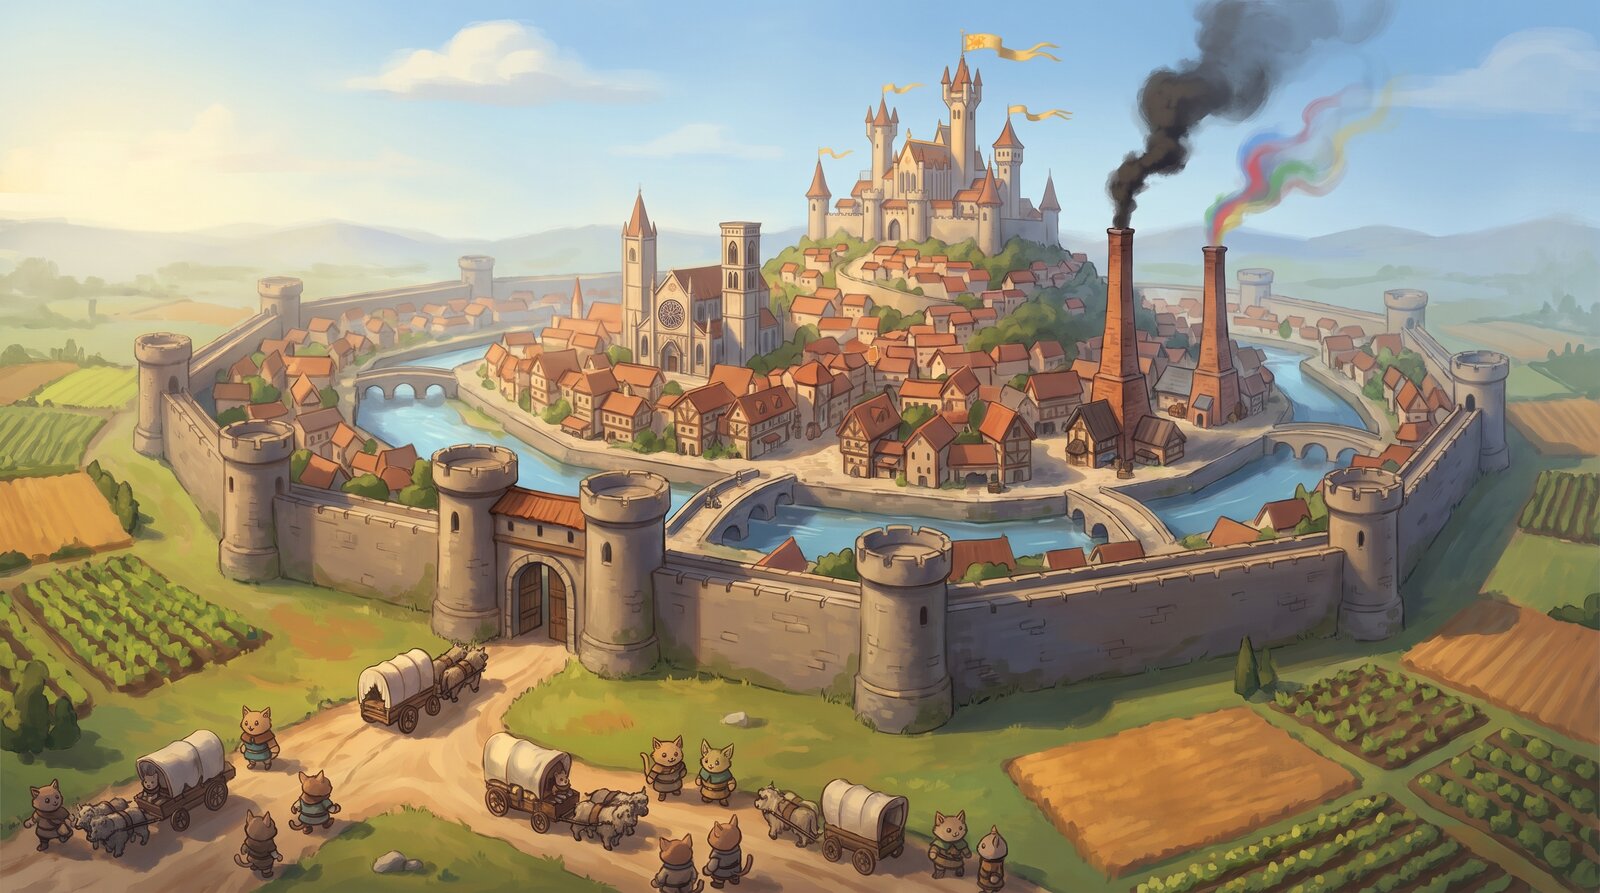
Aurélia is the capital of Valdora and the largest city in the game: an eight-sided wall, with a gate in the middle of each side, cut from north to south by the Lume River. It has no monsters, and the streets are packed earth; as in Whisper Village and in Musgueira, fighting between players and duels are allowed inside it.
How to get there. From the Ruins, leave through the yard's east gate and follow the road to Baron's Road, which crosses the woods and the foot of the mountains; it ends at the West Gate, where the Aurélia sign tells you where each quarter is and the West Gate Guard marks on the minimap the inn, the merchant, the storage, the Registry and the Request Board. From Musgueira, come along Orchard Road. The other gates lead to Ventania Road (the North Gate) and to the King's Road, toward the Amber Coast (the South Gate).
| Quarter | What's there | Who to look for |
|---|---|---|
| New Sunset Quarter, by the West Gate | the Sunset Plots (42 lots), the Land Registry and the Request Board | Scribe Ottavio Bassi, who sells the lots (see Your house) |
| Market, near the Lume Bridge | the Bridge Inn, the Covered Market, the League Warehouse, the Auction House and the Open Market | Innkeeper Bruno Sartori (the room and the return point), Maid Rina Serra (food), Merchant Viola Caruso (buys your loot and sells the basics and the MP potion, which the villages don't have), Storekeeper Pietro Lanza (the account storage), Auctioneer Carlotta Neri (explains the auction) and Stallkeeper Beppe Castellani (the Open Market) |
| Cathedral Quarter, where Royal Avenue crosses Sunset Street | the Cathedral, with the Edict on its door, the Holy Office and Cathedral Square | Bishop Della Rovere and Inquisitor Sforza (the Church and the Inquisition), Father Giovanni (marriages and divorces) and Notary Lucrezia Pagano (founding associations) |
| Crafts Quarter | the Square of the Two Smokes, with Anvil Hall and Still Hall, and the 12 Smoke Workshops | Master Gualtiero Ferrucci (the blacksmiths) and Master Ilaria Fumagalli (the alchemists), who teach the trades |
| Crown Heights | the Royal Palace (closed), Malaspina Palace, the Royal Academy and the six Hilltop Townhouses | the four advanced masters, in front of the Academy, who teach each class's advanced skill from level 100 on; Librarian Teodora Ricci, Steward Corrado Fini and the Palace Guard |
| East Gate | the Guard Barracks and the Stables | Captain Serena Valli, who receives the oath of the Aurélia Guard |
| Riverside, on the east bank | the Docks, the 21 Riverside Houses and Rooftop Alley | at night, the Rooftop Shadow (the Rooftop Brotherhood) and Fixer Nello Sposito (unregistered associations) |
| South Wall | the tenements by the wall and two vegetable gardens |
The Silent One of Vitta, in front of the Bridge Inn, watches over the return point of those who wake up in the city.
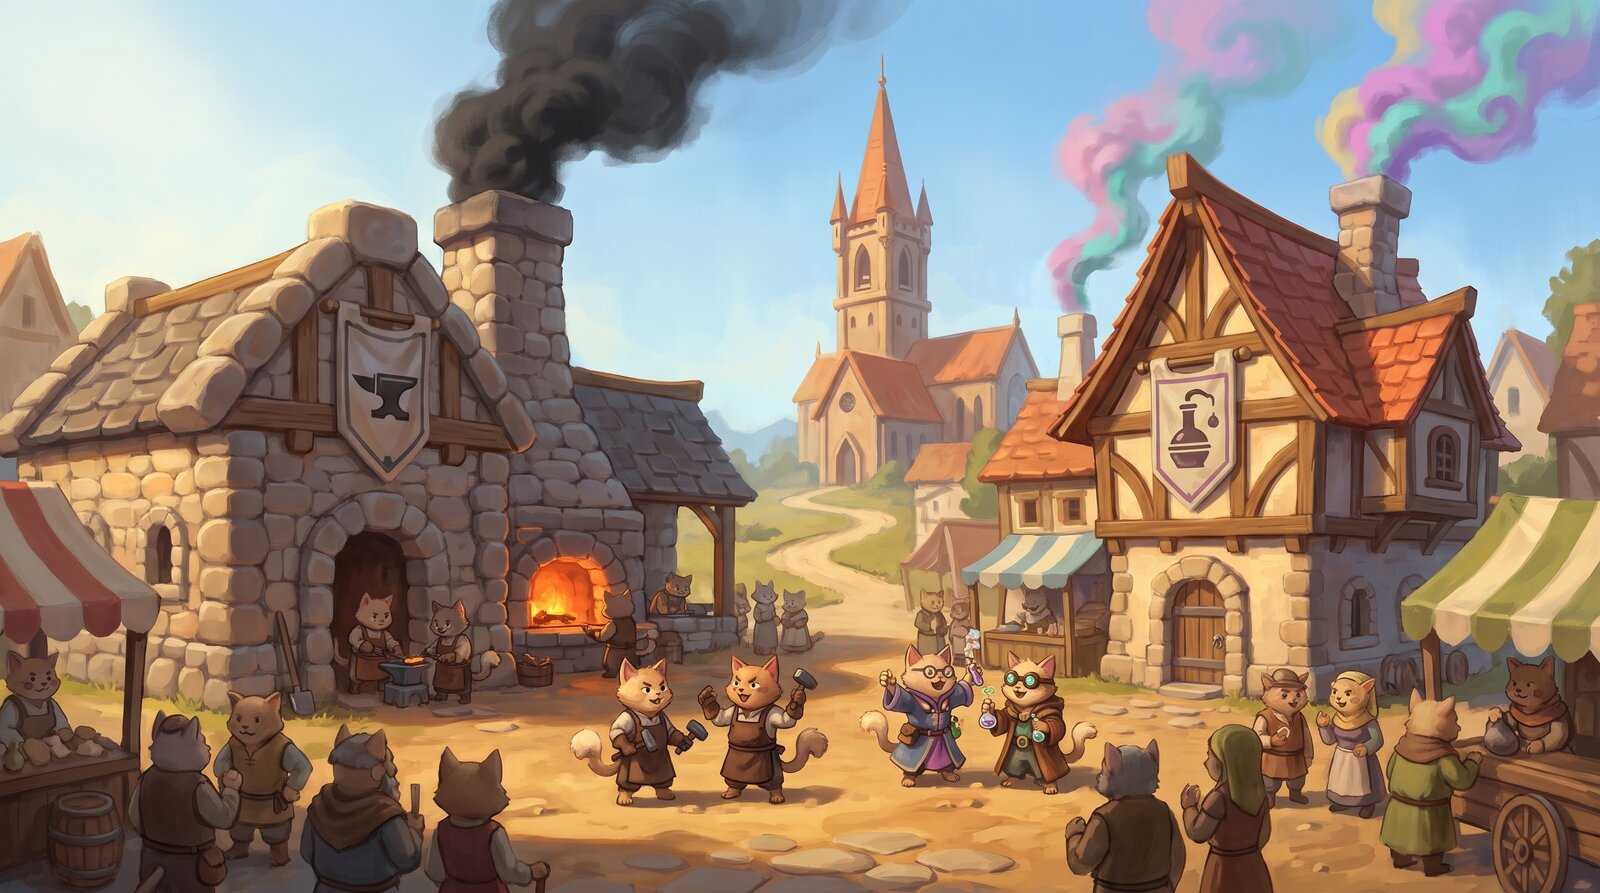
The Square of the Two Smokes is home to the blacksmiths' headquarters, the Anvil, facing the alchemists', the Still. People say who won the week by whose smoke is thicker.
Musgueira, the farmers' village
Musgueira is the farmers' village, to the northwest of the vale: the herbs the Still buys, the wheat, the honey and Vitta's Hospital. Like Aurélia, it has no monsters, and fighting between players and duels are allowed in it.
How to get there. In the Whispering Grove, follow the Musgueira Trail to its western end: the log-framed exit comes out at the eastern edge of the village, where the Musgueira sign tells you where everything is. From the village you can take Orchard Road (to Aurélia), the trail to the Ventania Moors (to the north, the land of the wild herds) or the one to the Misty Coast (to the south).
| Place | What's there | Who to look for |
|---|---|---|
| Fountain Square, in the middle | the fountain, the Moss Inn, the Chapel of the Four, the League Stall and the Village Registry | Innkeeper Marta Fiore (the room and the return point), Maid Gemma Costa (food), Merchant Elio Santoro (buys loot and sells the basics for those who live off the land), Surveyor Paolo Ferraro (sells the lots), Canon Ermanno Testa (the Curia), Father Titto (marriages) and, on the fountain's bench, Old Amadeo Bruni, who tells the story of the whispers, one per visit |
| Still Gardens, to the northwest | the herb beds, the Greenhouse and the Herbalist's house | Herbalist Fiorella Gallo, who buys herbs and sells wild herbs |
| Vitta's Hospital, to the northeast | the hospital of the Poor of Vitta and its vegetable garden | Sister Celeste Amato |
| Fields | the wheat, the Mill, the Granary and the beehives | Miller Gino Marchetti (the wheat for bread), Beekeeper Dora Lombardi (the honeycomb) and Farmer Agnese Sala, who asks for help against the toll and takes the people's petition to Aurélia (the rebel missions) |
| Fountain Cottages, Woodland Plots and Brookside Farms | 15 cottages, 6 plots and 6 farms | Musgueira's lots, for sale at the Registry |
Moss Brook runs through the village, and the streets cross it on bridges. The Silent One of Vitta, in front of the Moss Inn, watches over the return point.
The other settlements
The places below can already be visited, but their layout and their names may still change.
- Ventania, the village of the wind on the north coast, at the mouth of Crow's Strait: the wool and the tanned leather the Anvil buys. It is Valdora's port: from the pier, Boatman Ronan Alder takes whoever pays the fare to Ponta Salgada, the fishing village in the south of the Isle of Vésper.
- Vésper, the island's city, seat of the Guild, on a hill above the sea.
- Vau Dourado, where the dirt road crosses the river: House Malaspina's toll. They say the ford is golden because of the toll, not the sun.
- Pedravale, the stone city of the quarries, in the south, where the King's Road and the west coast trail end.
Each settlement has its own inn, its shops and its Land Registry, which sells the lots there.